DIY Board and Batten Accent Wall (No Wood or MDF needed!)
A board and batten accent wall is one of those projects that instantly elevates a room. It adds depth, character, and that custom “designer” look that makes a space feel intentional.
But with the rising cost of wood and MDF, this simple project can get expensive fast.
That’s when I tried something unexpected: using drywall (Sheetrock) instead of traditional boards. It’s incredibly affordable, easy to work with, and once installed—you truly can’t tell the difference.
This project completely transformed our guest room, and the best part? It was done on a budget.
Disclaimer: This post contains affiliate links. I may earn a small commission if you make a purchase, at no extra cost to you.
Project Snapshot / Quick Facts
- Skill Level: Beginner/ Intermediate
- Time Required: 1-2 Weekends
- Cost: ~$80
Materials & Tools You Need for Custom Accent Wall
Materials
- Drywall (Sheetrock) panels (4×8 sheets)
- Liquid nails (construction adhesive)
- Brad nails
- Joint compound (lightweight)
- Caulk
- Paint (color of choice)
- Baseboard (existing or new)
Tools
- Table saw (for ripping boards)
- Miter saw
- Brad nailer
- Laser level
- Drywall sanding sponge
- Safety Gear (My pink PPE from Amazon)
Step-By Step Instructions
Step 1: Plan Your Layout & Measurements
Before cutting anything, I spent time designing the layout.
- Goal: evenly spaced square pattern
- Board (stile) width: 4.5 inches
- Desired square size: approx. 17–20 inches
Since the wall wasn’t perfectly square (159” wide × 96” tall), I used a wainscoting calculator to dial in the layout. Input wall dimensions and board width and so I landed on 7 columns × 4 rows. One small adjustment: The bottom row ended up about 1” taller due to the baseboard—but it’s barely noticeable.
Tip: Always design based on your wall width first to keep spacing consistent.
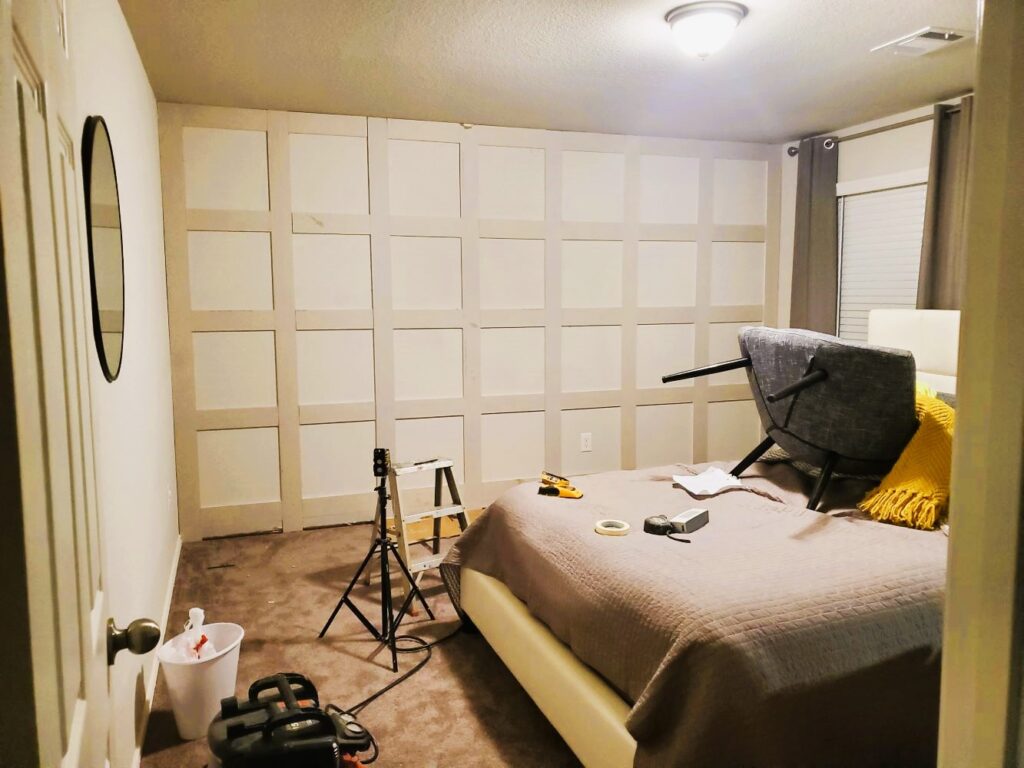
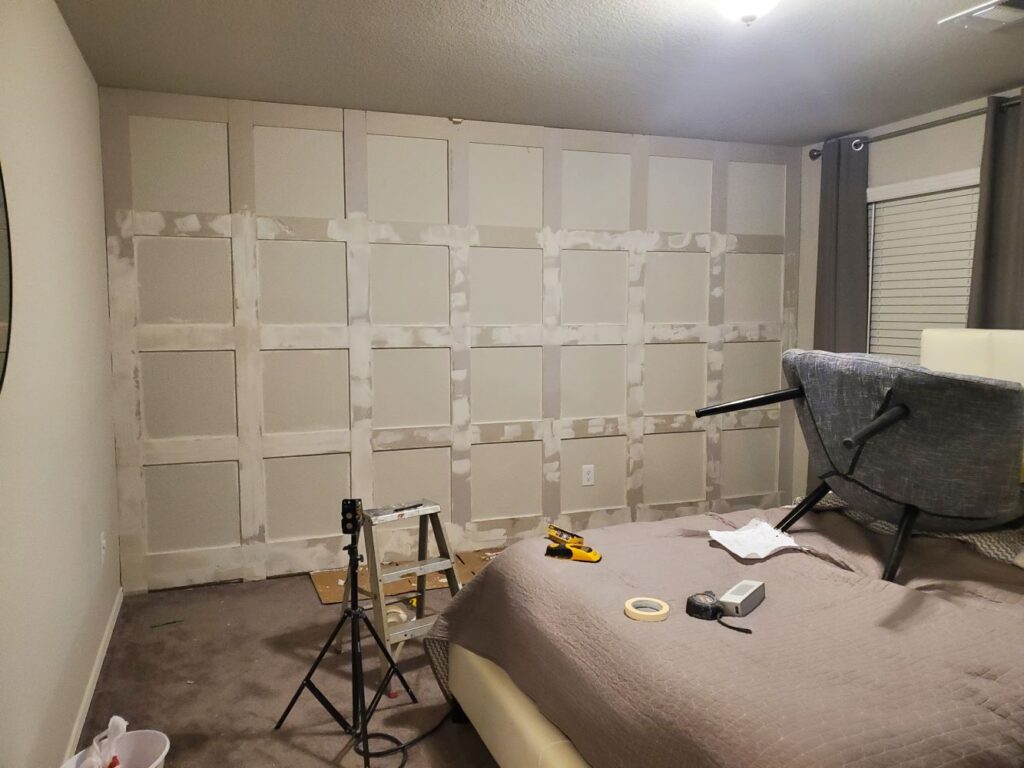
Step 2: Cut Drywall into “Boards”
Instead of wood, I used drywall sheets and cut them into strips. I used a table saw to rip drywall into 4.5” wide boards making sure I cut enough pieces for vertical and horizontal layout. Important notes: This step is very dusty. Best done outdoors or in a well-ventilated space
Safety setup:
- Full respirator mask (P100 filters recommended)
- Safety goggles
- Hearing protection
Before installation:
- Removed the baseboards carefully (they’ll be reinstalled later)
Tip: Drywall cuts easily but creates fine dust—don’t skip proper protection.
Step 3: Install Vertical Boards First
Starting with vertical boards simplifies the process.
- Used construction adhesive (liquid nails) on the back
- Secured boards with a brad nailer
- Used a laser level to ensure perfectly straight placement
Since the ceiling height was 8 ft:
- No vertical cuts were needed—huge time saver
Spacing was measured carefully to match the layout plan. Tip: Even if measurements are planned, always double-check spacing during install.
Step 4: Measure & Install Horizontal Boards
Once vertical boards were in place:
- Measured each section individually (walls are rarely perfectly even)
- Cut horizontal boards using a miter saw
Installation process:
- Applied adhesive
- Positioned using laser level
- Secured with brad nails
This step brings the full grid pattern together. Tip: Measure each section separately instead of assuming they’re identical.
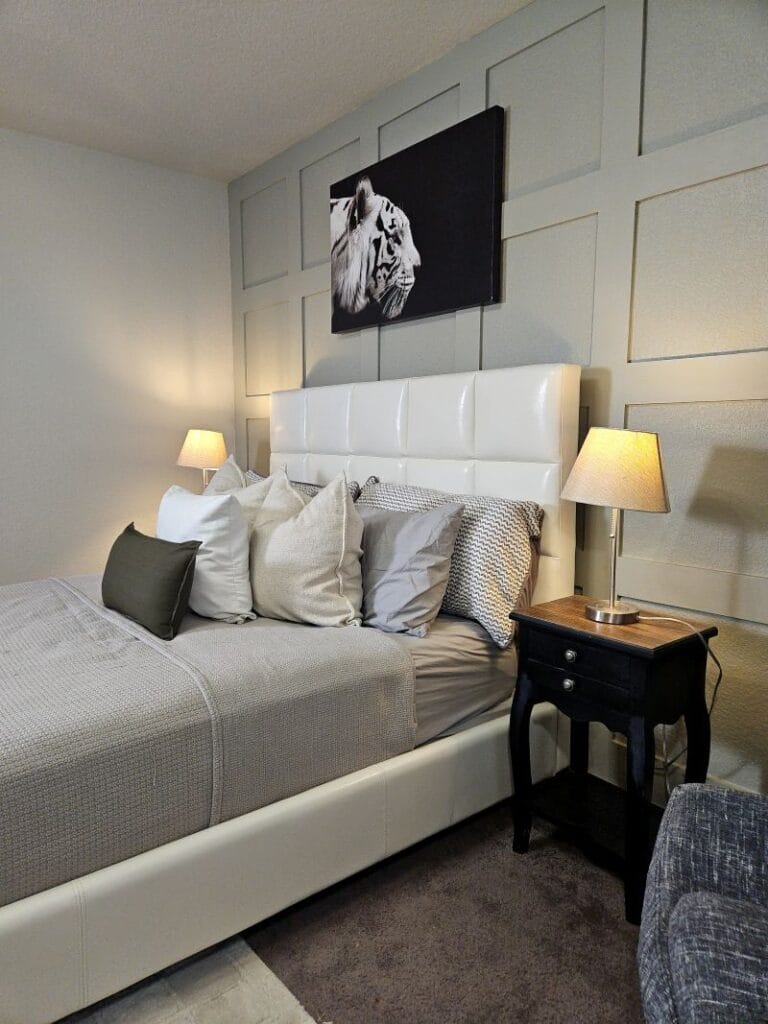
Step 5: Smooth Seams with Joint Compound
To make the drywall strips look like solid trim:
- Applied lightweight joint compound over seams and edges
- Focused on transitions between boards
Once dry:
- Sanded everything smooth using a drywall sanding sponge
This step is key—it removes the “layered” look and creates a seamless finish. Tip: Take your time sanding—this is what makes it look professional.


Step 6: Reinstall Trim & Caulk
After sanding:
- Reinstalled the baseboards
- Caulked all gaps:
- Between boards and wall
- Along ceiling edges
- Around baseboards
Caulking helps:
- Hide imperfections
- Create clean, crisp lines
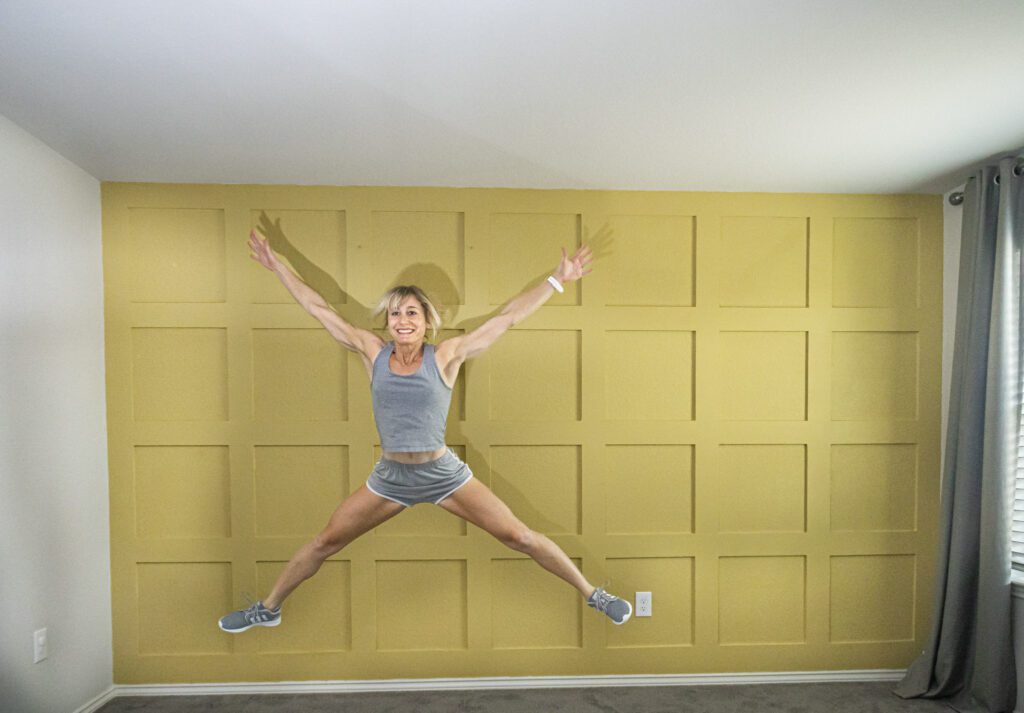
Step 7: Paint the Accent Wall
For the original look:
- Chose a bold mustard yellow
- Mixed it slightly with a neutral gray (similar to “Agreeable Grey”)
- Sprayed the paint for a soft, slightly faded effect
The result:
- Warm, bold, and full of personality


Step 8: Update the Look Over Time
After a few years, my style changed. The mustard tone felt too bold, especially after updating other parts of the room (like adding a new DIY desk). So I refreshed the wall:
- Mixed leftover paints to create a soft sage green/beige tone
- Repainted the entire wall
- Added cozy decor:
- Neutral rug
- Pillows
- Side table
- Floor lamp
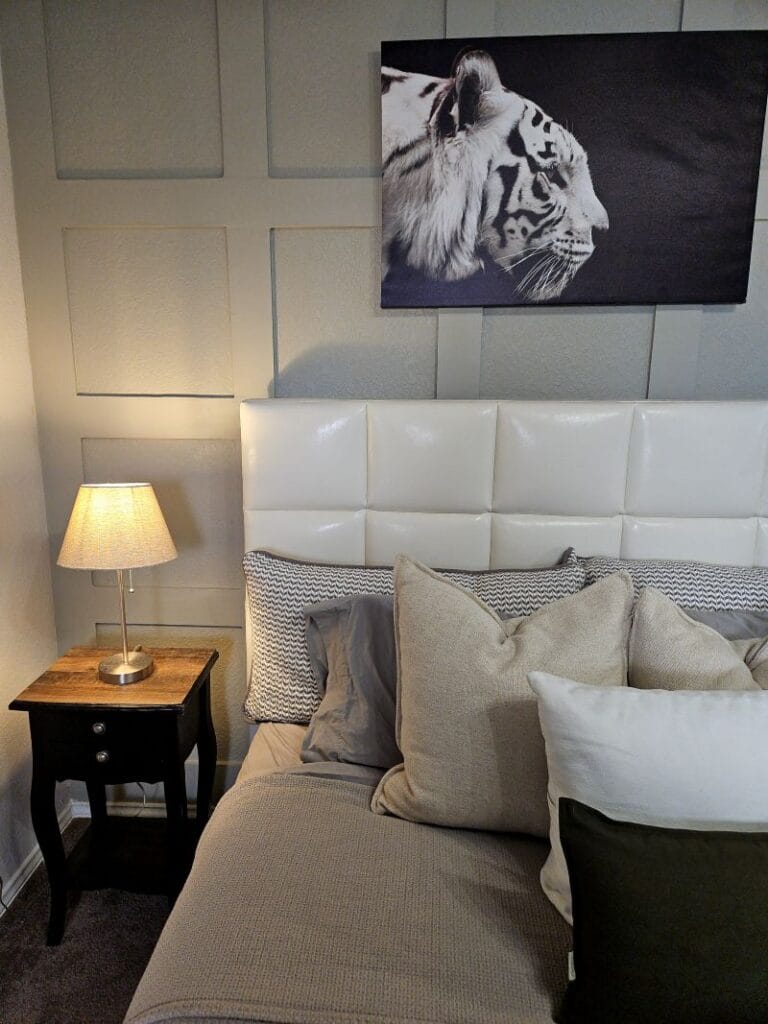
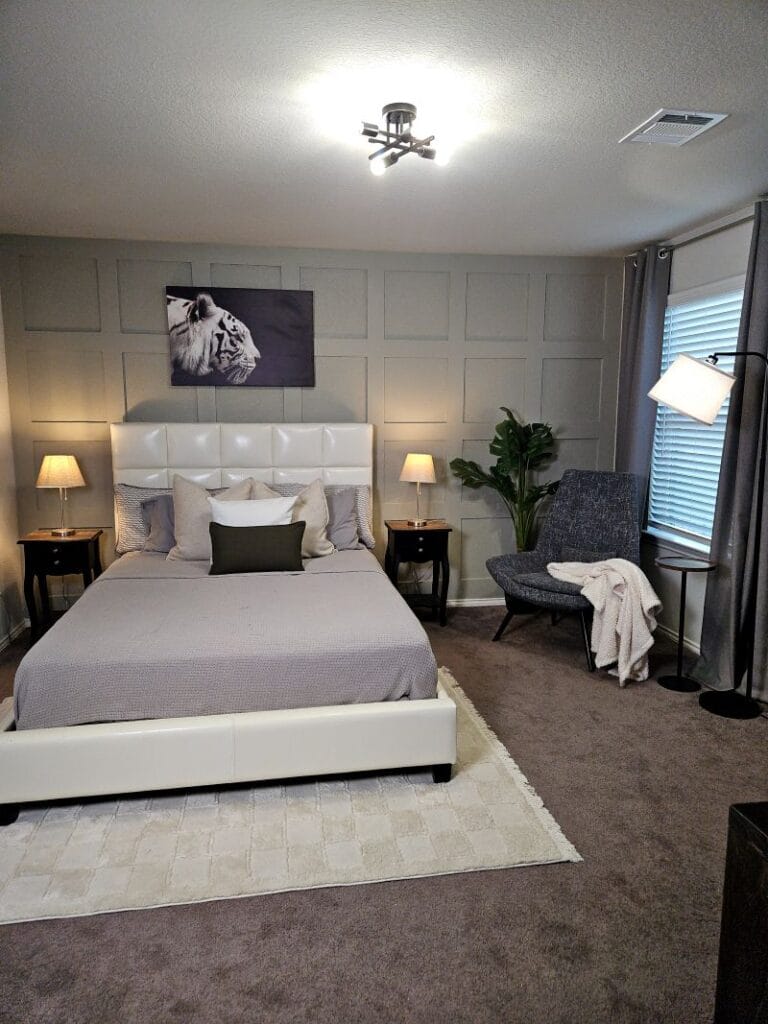
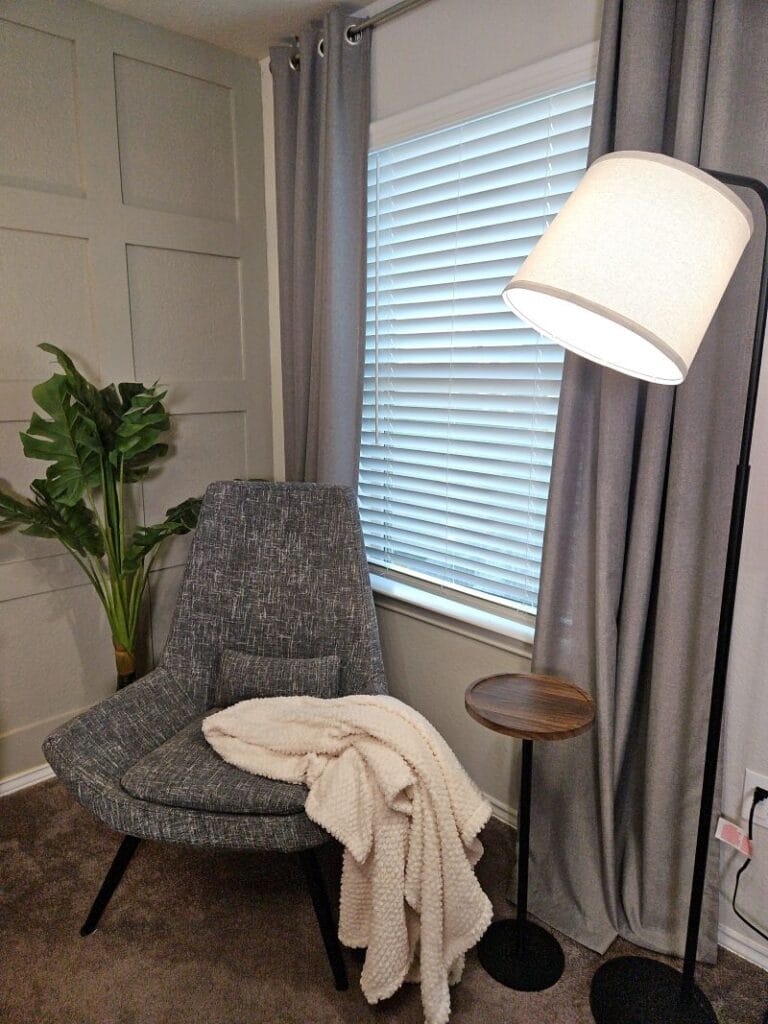
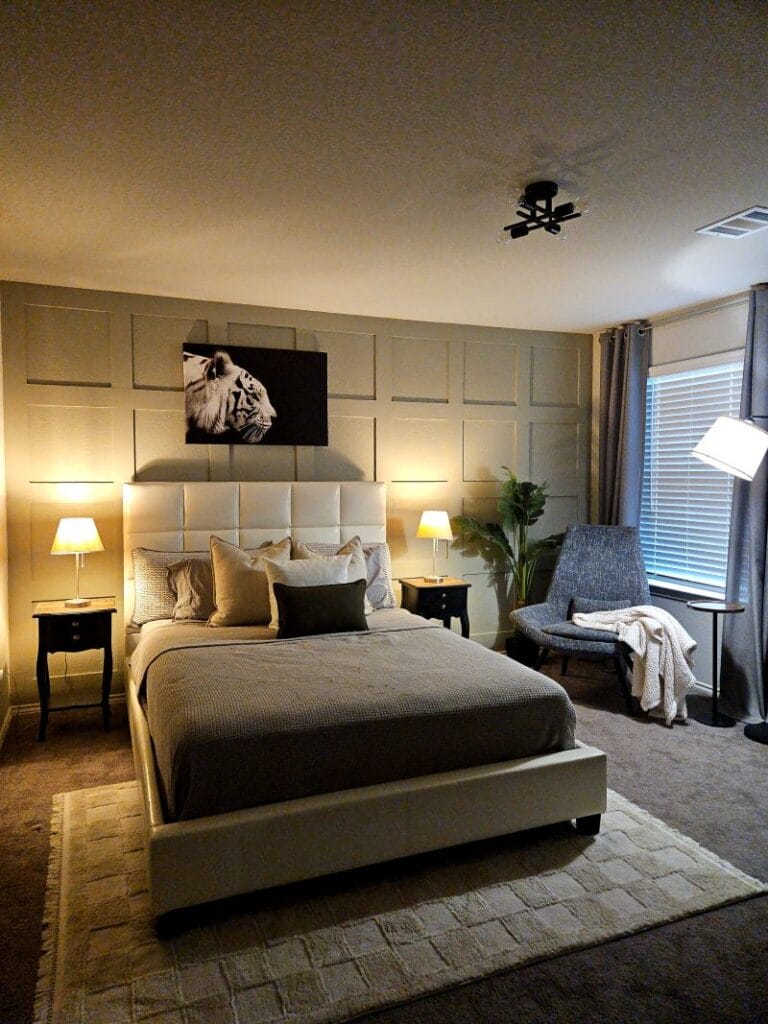
The result became much more Calm, Natural, Cohesive with the rest of the home. This project completely transformed the guest room. What started as a plain wall is now: A bold design feature. A customizable backdrop. A budget-friendly upgrade. And the best part? You can easily repaint it anytime to match your evolving style.
DIY Custom Accent Wall Q&A, Pro Tips
Q: Can drywall really replace wood for board and batten?
A: Yes! Once installed and finished, it looks nearly identical.
Q: What’s the biggest challenge?
A: Dust from cutting drywall. That’s why Always use a respirator when cutting drywall. Also, take your time when using the joint compound to achieve a seamless finish.
Related Projects
Looking to upgrade your rooms with modern wainscoting/ board and batten? Check out my related projects:
Shop the Look
Create this cozy guestroom setup with the items (or similar) that brought this project to life: Shop my Guestroom on Amazon.