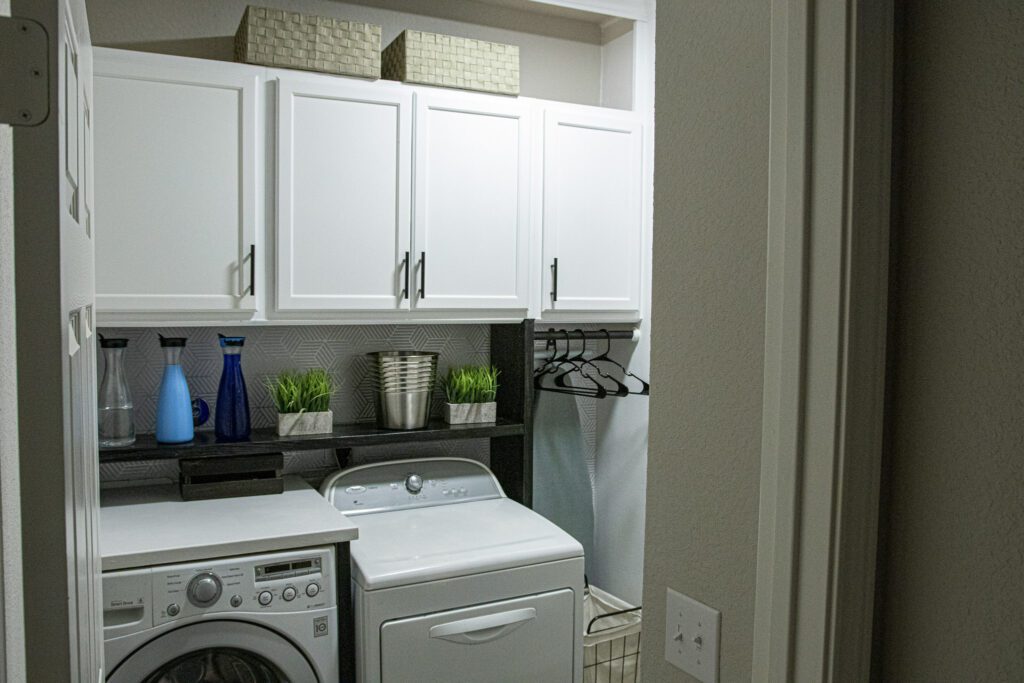
DIY Laundry Room Makeover on a Budget: From Cluttered to Clean for Under $200
Our builder-grade laundry room didn’t exactly inspire organization. Ours came with a single 11-inch MDF board they called a “shelf”—and that was it. At first, we tried to manage with baskets, but it didn’t take long before the space turned into a pile of cleaning tools, supplies, and chaos.
I wanted a clean, organized look with cabinets and hidden storage—but without spending a fortune. So I challenged myself to complete a full laundry room makeover for under $200… even during peak material prices.
Disclaimer: This post contains affiliate links. I may earn a small commission if you make a purchase, at no extra cost to you.
 Before
 After
After
Project Snapshot / Quick Facts
- Skill Level: Intermediate
- Time Required: 2-3 Weekends
- Cost: ~$200–300
Materials & Tools You Absolutely Need for a Laundry Room Makeover
Materials
- Used wall cabinets (Facebook Marketplace)
- 2×3 studs (for framing closet)
- OSB boards/ Drywall (for closet walls)
- Pine boards (for shelf)
- Wood stain + polyurethane
- Peel & stick wallpaper (I used this from Amazon)
- Closet doors (louvered style)
- Cabinet hardware
- Crown molding
Tools
- Drill
- Circular saw or miter saw
- Sander
- Paint sprayer (or roller)
- Level
- Measuring tape
- Safety Gear (My pink PPE from Amazon)
Laundry Room Makeover (Step-by-Step)
Step 1: Plan and Design Laundry Room Layout
Before diving in I assessed what wasn’t working: No storage, cleaning tools piled in corners, only one flimsy shelf. The goal was to add cabinets for hidden storage, create space for cleaning tools and improve overall look without overspending.
Step 2: Install Affordable Cabinets
Cabinets can easily blow your budget—but this is where patience pays off. I checked Facebook Marketplace daily for several weeks and finally found used stock cabinets at a fraction of retail cost.
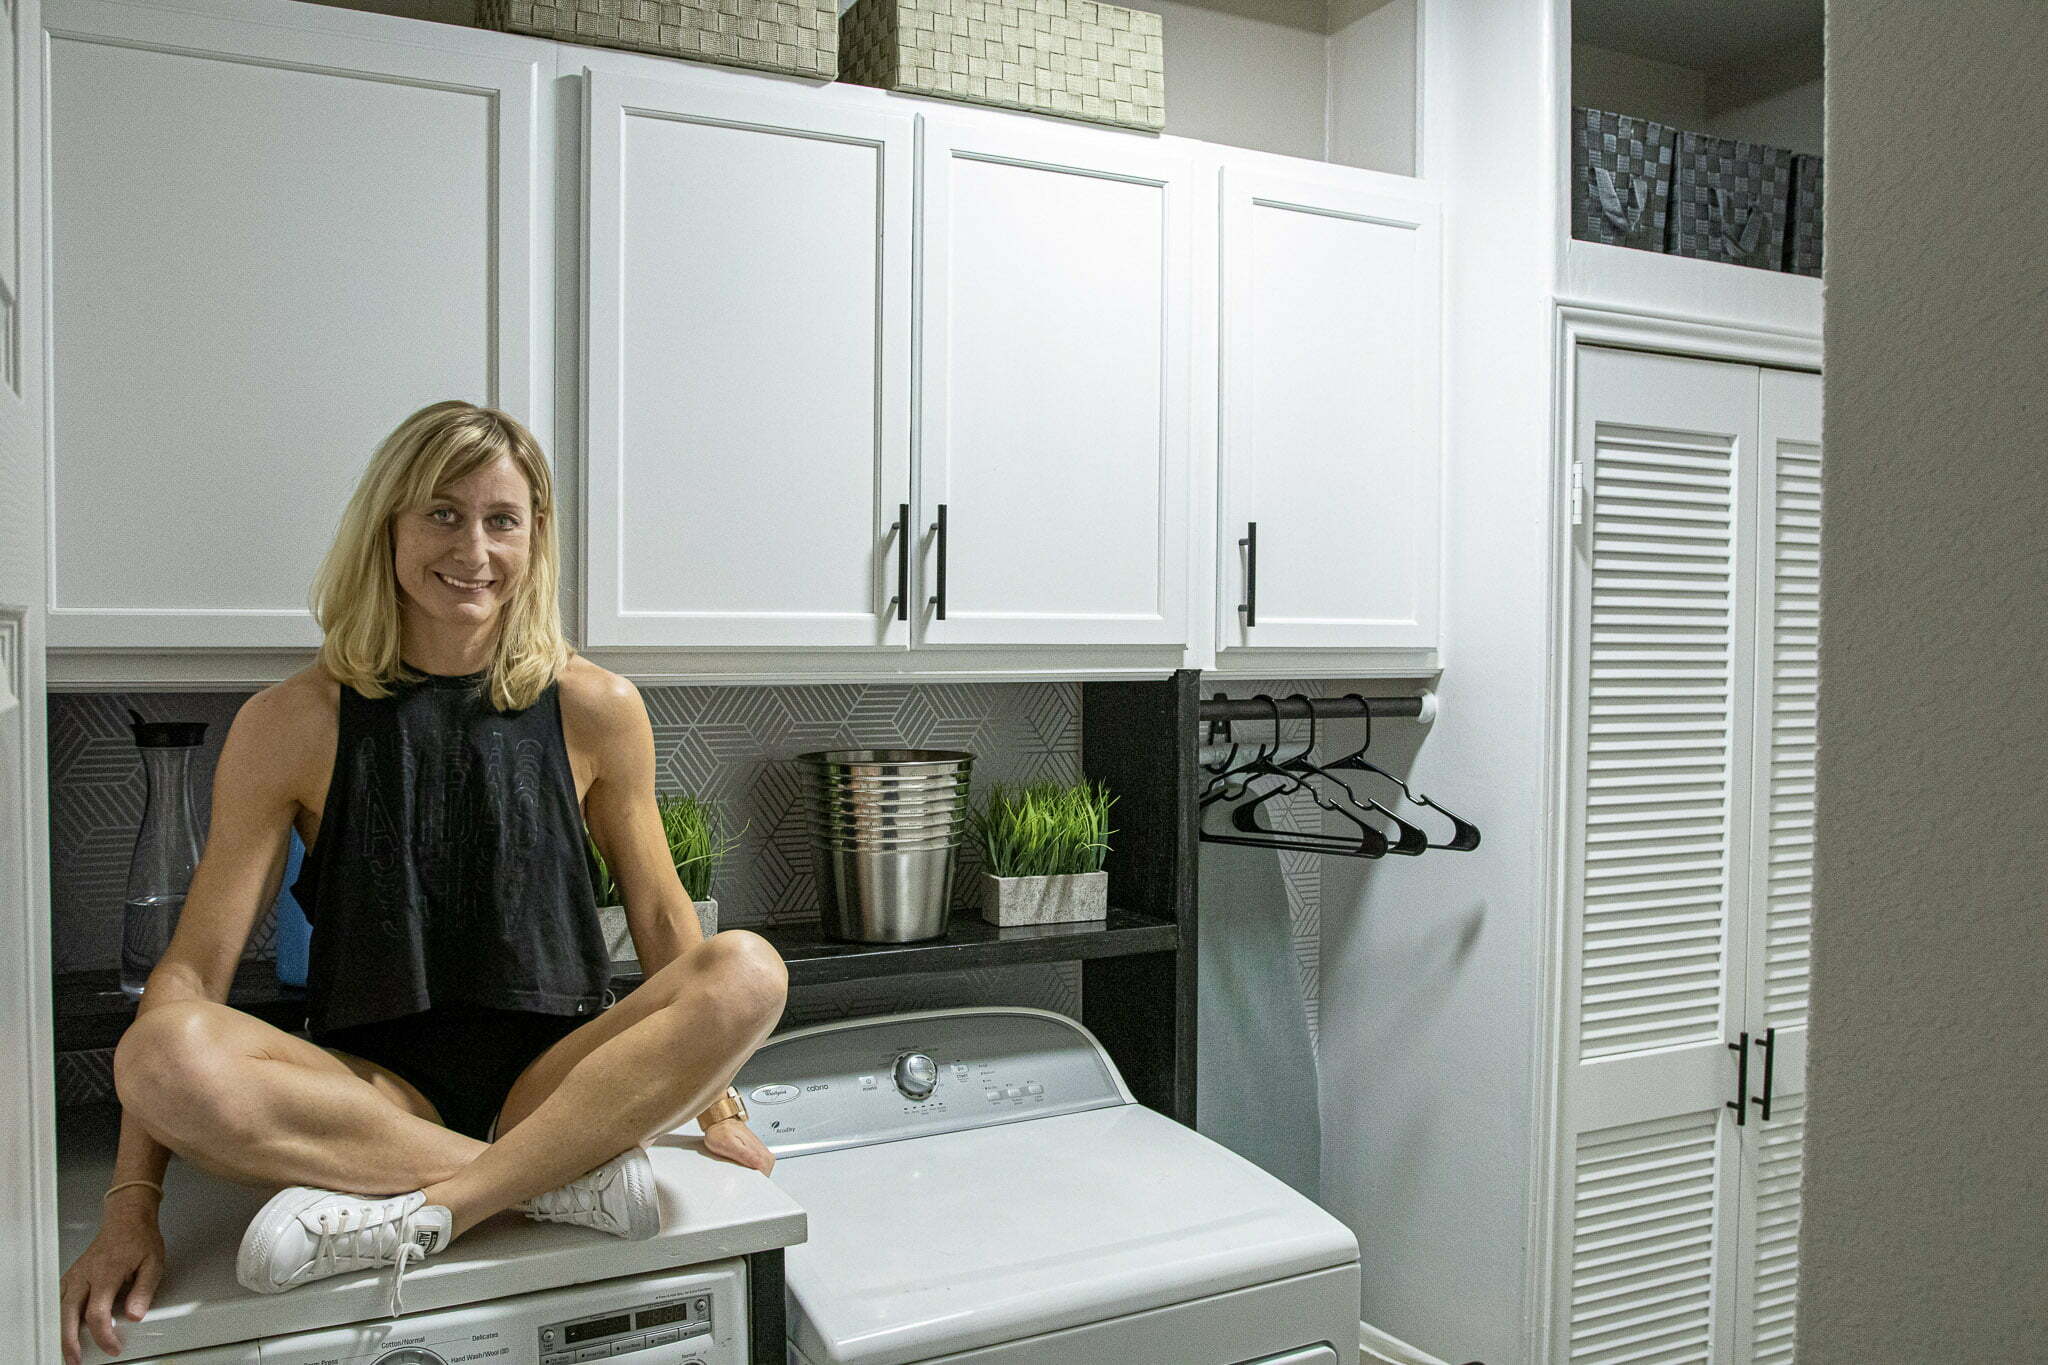
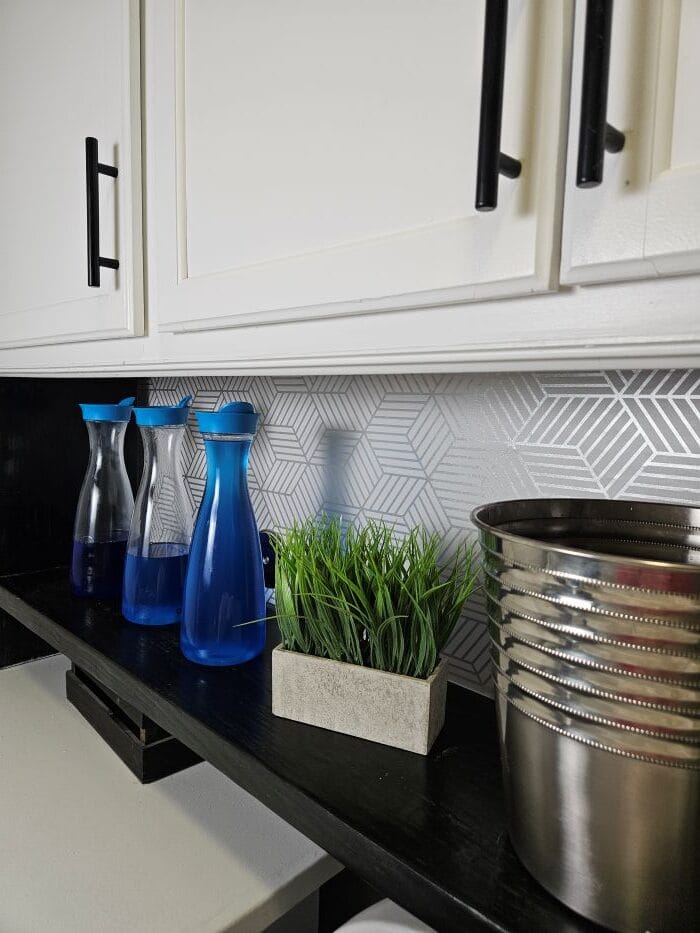
To refresh them: I lightly sanded them and applied a fresh coat of paint (spray gun for smooth finish) and added new hardware. Once installed above the washer and dryer, it instantly upgraded the space and provided much-needed storage.

Step 3: Build a Cleaning Tools Closet
To hide bulky items like vacuum, broom and mop, I built a small closet. For the Framing I used 2×3 studs to frame a narrow enclosure. For the wall I used leftover OSB boards and smoothed the surface using joint compound. This was very labor intensive, it probably would have been easier and still cost efficient to simply buy a sheet of drywall instead.

Step 4: Install Closet Doors for a Clean Look
To finish the closet I found plantation-style louvered doors on Facebook Marketplace. These are perfect for a small space like this, as they allow light and airflow (perfect for damp items). This step really transformed the space from DIY to polished.


Step 5: Build a Simple Laundry Room Shelf
I originally wanted a countertop—but due to the dryer setup, it wasn’t practical. So instead, I built a simple wood shelf above the washer and dryer using leftover 2×12 pine boards from out patio. I stained it with Ebony wood stain and applied oil-based polyurethane as a sealant. I made the shelf freestanding to allow for easy removal when accessing appliances.
Step 6: Add Backsplash & Functional Details
To improve the wall behind the machines I covered the textured drywall with peel-and-stick wallpaper. This was much cheaper than tile, aasy to install and adds visual interest. Then I added a wooden rod between closet and shelf → drying rack and a simple wall hook → ironing board storage.
Step 7: Finishing Touches
To complete the makeover I installed crown molding for a built-in look. We also updated the light fixture and added minor decor and organization hacks for a clean, cohesive feel. These small upgrades made a big difference in the final result.
Now we have hidden storage for cleaning tools, Organized cabinets and a clean, intentional design. And best of all—it stayed well under budget.
DIY Laundry Room Makeover Q&A, Pro Tips
Q: Why use Billy bookcases instead of custom cabinetry?
A: Cost and flexibility. They’re affordable, adjustable, and easy to modify.
Q: Do mason jars really hold up long term?
A: Yes. They’re durable, dishwasher-safe, don’t fade, and resist cracking far better than many plastic containers.
Q: How do you keep it organized long term?
A: Category-based shelving and refill bins make maintenance simple. Once jars run low, refill from backup storage.
Related Projects
Looking for more organization and storage upgrades? Check out my related projects:
- DIY Pantry Makeover: From Builder-Grade Shelves to a Smart, Space-Saving Storage System
- Smart Home Organization for Tight Spaces
- Storage & Organization
Shop the Look
Check out all of my home organization finds here.