DIY Range Hood Microwave Cover: Hide Your Microwave in Style
Do you have a microwave serving as your kitchen vent? No extra space for a separate microwave? You’ve been dreaming of a sleek, custom range hood design? Now you can have it all!
In this tutorial, I’ll show you how I built a custom wooden range hood cover to hide my microwave. From prototype to finishing touches, I’ll walk you through every step so you can create a functional and stylish solution for your kitchen.
Disclaimer: This post contains affiliate links. I may earn a small commission if you make a purchase, at no extra cost to you.
Project Snapshot / Quick Facts
- Skill Level: Intermediate – Advanced
- Time Required: 2-3 Weekends
- Cost: ~$100–150
Material & Tools List
Materials
- 2×3 wooden studs
- 1/4″ birch plywood
- Wood stain: Dark Walnut & Antique White (Varathane)
- Continuous hinge
- Hydraulic hinge (Amazon)
- Power strip
- Screws, Brad nails
- Wood Glue
Tools
- Drill
- Nail Gun
- Router
- Table Saw
- Measuring Tape
- Clamps
- Sander/ Sandpaper
Step-by Step DIY Range Hood Instructions
Step 1: Build a Prototype
Before committing to the final project, I built a prototype to test the design and dimensions. It looked rough, but it gave me confidence that the concept was feasible.
💡 Tip: Don’t skip the prototype! It ensures you get the angles and fit just right.
Step 2: Install the Range Hood Base Frame
This solid base is crucial for supporting the microwave cover latch later.
- Remove upper kitchen cabinet doors and crown molding.
- Build a wooden frame using 2×3 studs for the top part of the range hood cover.
- Attach the frame to the upper cabinets and ceiling using wood screws.
Step 3: Build the Microwave Cover Latch
- Construct a three-sided latch frame out of 2×3 studs, leaving the bottom open.
- Ensure the latch is positioned for easy reach — not too low to hit your head, not too high to not reach it.

Step 4: Install the Microwave Cover Latch
- Attach the latch to the base frame using a continuous hinge.
- Mount one hinge onto the base studs and the second onto the latch frame.
Step 5: Attach Range Hood Plywood Covers
- Install 1/4″ birch plywood onto the base and latch using a nail gun. 💡 Tip: You may need to add a power strip on top of the cabinet if you can no longer reach the outlet behind the microwave.
- Measure and cut side pieces using a cardboard template for exact angles.💡 Tip: Templates save mistakes when cutting angled pieces.
Step 6: Add Shaker-Style Trim
- Cut strips of 1/4″ birch plywood for the shaker-style frame.
- Bevel the inner edges using a router.
- Attach strips with wood glue, ensuring they create a lip to hide plywood edges.
Step 7: Finishing Range hood Touches
- Stain the wood with a mix of Dark Walnut and Antique White (Varathane).
- Install a hydraulic hinge (Amazon) on the latch so it stays open. The hydraulic hinge makes daily use smoother and safer.💡 Tip: Glue a small wooden strip onto the microwave to attach the hinge if space is limited.
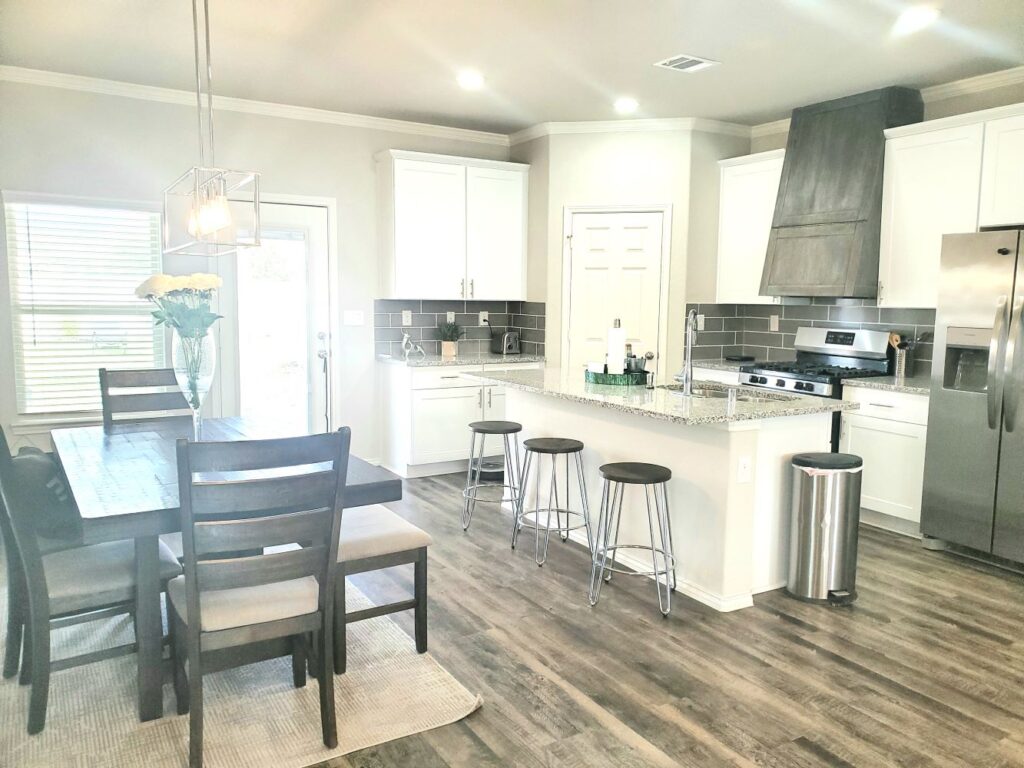
The microwave is now hidden behind a custom wooden cover, giving the kitchen a clean, cohesive look. The shaker trim matches the cabinets, and the hydraulic hinge makes opening the cover effortless.
Q&A, Pro Tips
Q: Does the construction hold up with frequent opening and closing of the latch?
A: Yes, it’s held up great! After about two years, the metal piece that connected the hydraulic hinge eventually gave out from stress, but I simply replaced the hinge and everything works perfectly again.
Q: Does it open evenly even though there’s only one hinge?
A: Yes! Because the 1/4″ plywood is so lightweight, the cover opens smoothly and stays level. Even after four years, the latch is still perfectly straight.
Q: Did you apply any protective coating?
A: Not this time — though I normally would. Surprisingly, even after four years, there’s been no change in color or material. I just wipe it down occasionally with a damp cloth to keep it clean.
Q: What did you do with the old cabinet doors?
A: Nothing goes to waste in my workshop! I repurposed the doors for my next project.
Q: Would you do anything differently if you did it again?
A: Overall, I’m very happy with how it turned out. If I were to do it again, I might use a higher-grade wood for the latch frame instead of standard studs — it would cost a bit more but give a more professional finish.
Q: Any other tips I should know before starting?
A: Definitely build a rough prototype first using scrap wood or even cardboard — it makes planning and measuring so much easier. Also, lightly sand or round off all corners so they’re not sharp once finished.
Related Projects
Check out my builder grade kitchen island transformation to further enhance your kitchen!


