DIY Exterior Door Installation: From solid brick wall to a functional backyard entry with built-in dog access.
Our garage backs directly into the yard—but strangely, there was no door connecting the two. The only way to access the backyard was either through the house or by opening the big garage door and walking around.
That made projects frustrating, and it also meant our dogs couldn’t move freely between the yard and their sheltered space in the garage.
The solution seemed obvious: install an exterior door with a doggy door. After receiving several contractor quotes that were far higher than expected—and didn’t match the look I wanted—I decided to take on the biggest DIY project I’ve ever attempted.
This was by far my most intimidating and physically demanding project, but the result was incredibly rewarding.
Disclaimer: This post contains affiliate links. I may earn a small commission if you make a purchase, at no extra cost to you.
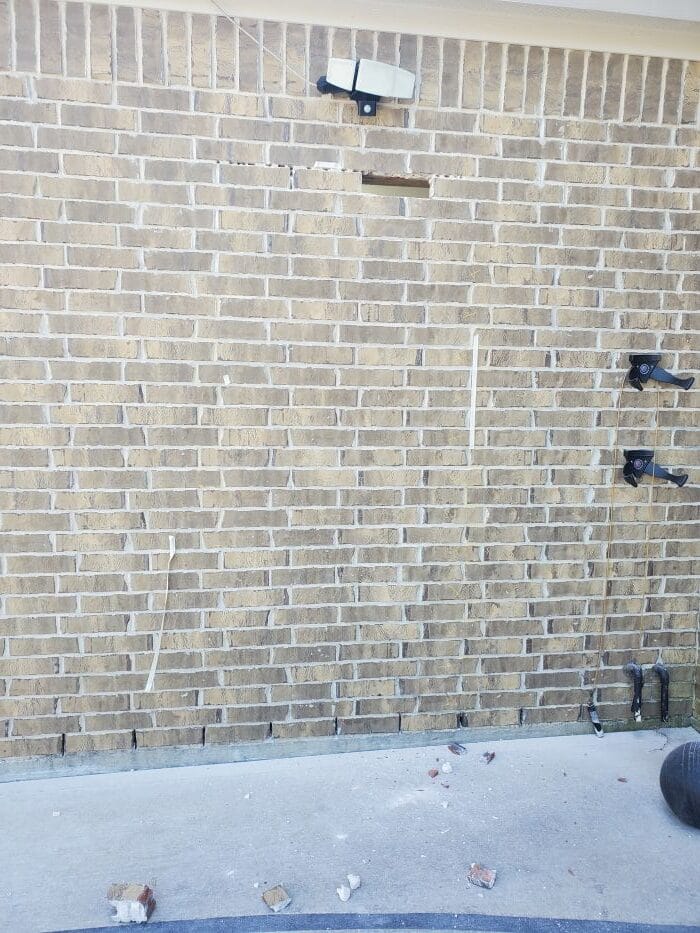
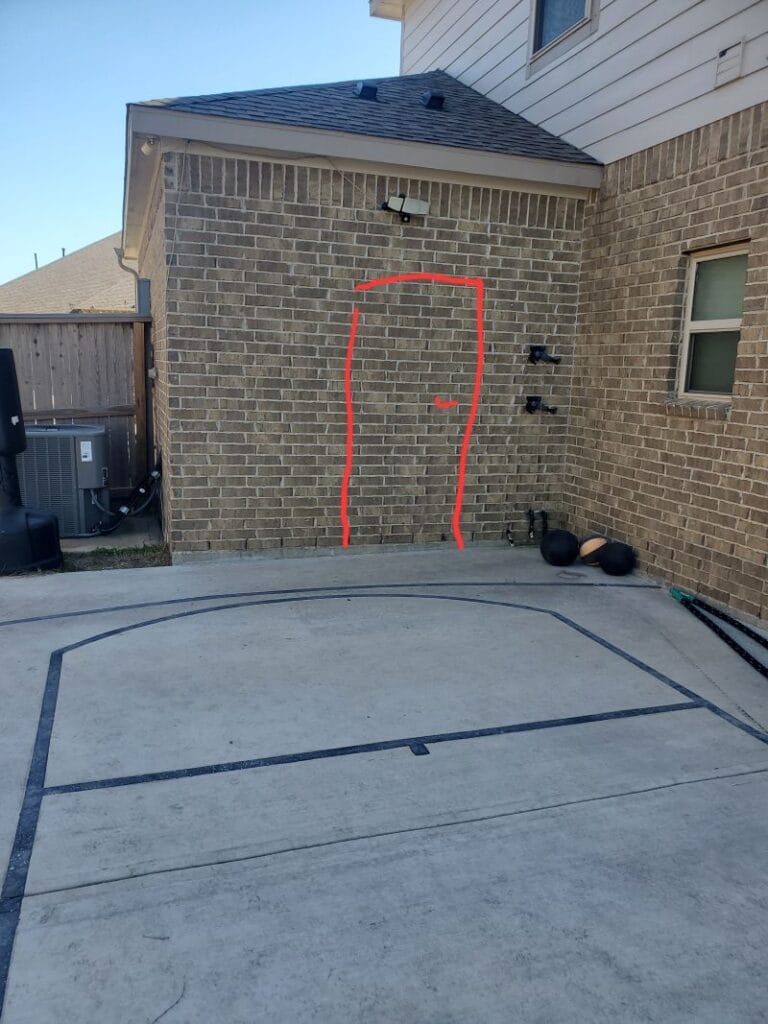 Before
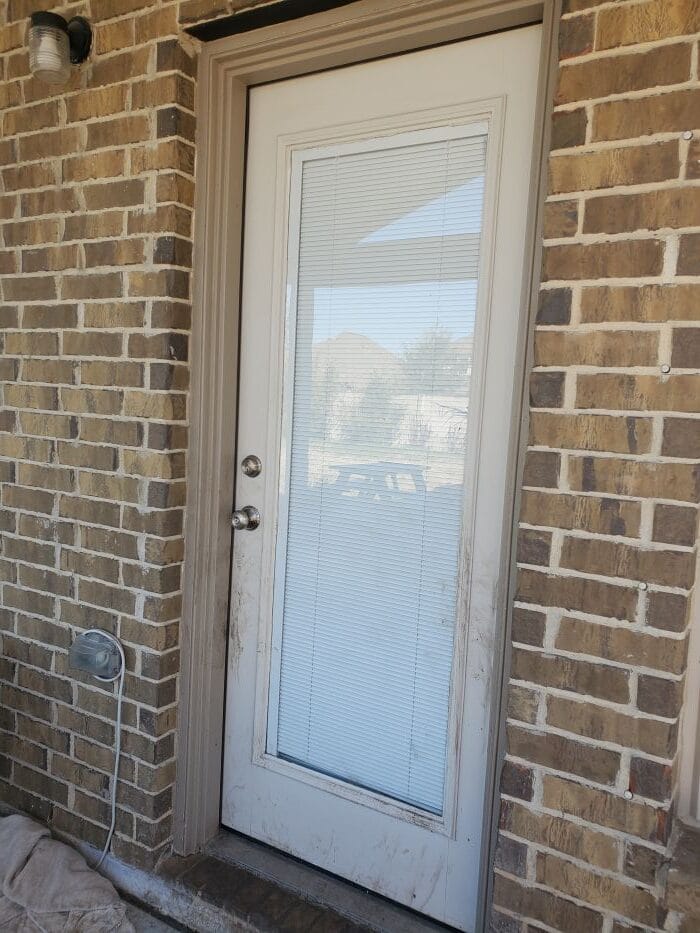 Desired Look
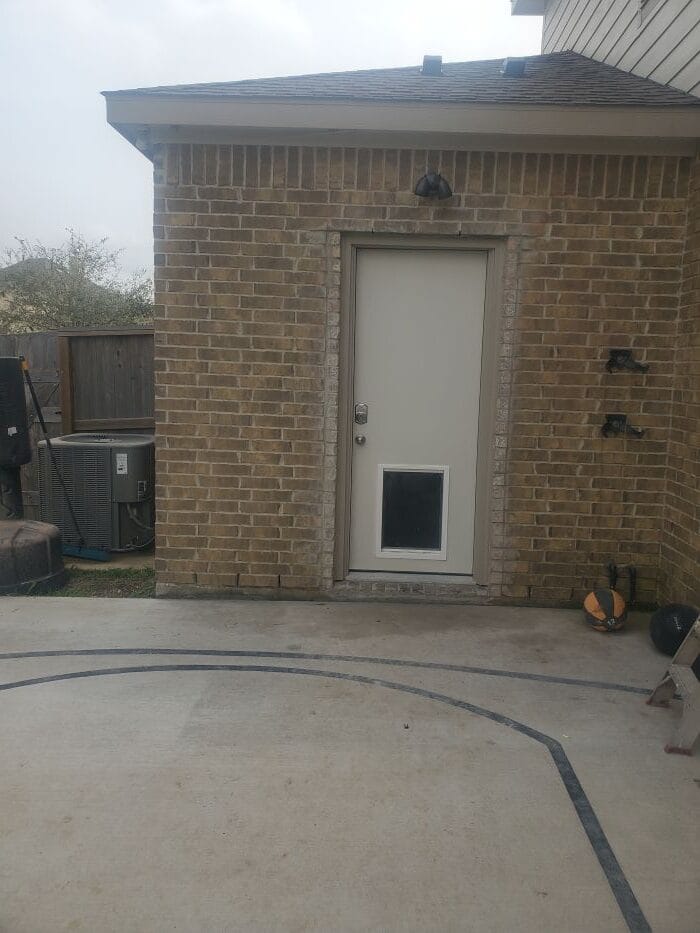 After
After
Project Snapshot / Quick Facts
- Skill Level: Very Advanced
- Time Requires: 3-4 Weekends
- Cost: ~$500-800
Material & Tools List
Materials
- Prehung exterior steel door
- Doggy door kit
- Steel lintel (mantel) support
- Bricks for reuse
- Mortar mix
- Flashing / insulation tape
- Brick trim pieces
- Exterior caulk
- Electrical wire and outdoor light fixture
- Drywall, mud, and paint
Tools
- PPE (Hearing Protection, Gloves, Safety Glasses, Full Face Respirator). Get my favorite (Pink) PPE from Amazon
- Line Laser Level (Amazon)
- Studfinder (Amazon)
- Circular saw with diamond masonry blade
- Wet Tile Saw
- Drill and masonry bits
- Reciprocating saw
- Chisel and hammer
- Level and measuring tape
- Jig saw (for doggy door cutout)
- Nail Gun
Step-by-Step: Exterior Door Installation and Brick Removal
Step 1: Plan the exterior door location
Before cutting anything, I spent time figuring out exactly where the door should go.
- Located wall studs inside the garage using measurements and a stud finder
- Measured the rough opening size required for the door
- Determined that two studs would need to be removed to fit the door properly
- Positioned the door centered between those studs to minimize structural changes
Planning also included checking:
- Door swing direction
- Clearance inside the garage
- Yard space outside the door
Step 2: Remove the Interior Drywall
Once the location was confirmed, I opened the wall from the inside.
- Cut and removed drywall around the planned opening
- Exposed studs and wiring.
- Checked for anything that might interfere with the door installation
Right away we discovered an electrical outlet and wiring running through the wall. To fix this:
- Electricity was temporarily shut off
- The wiring was rerouted to supply power for a future exterior light
- The circuit would later reconnect to the original path
 Removed Drywall
- Removing electrcial Wiring
 Outside Door Location
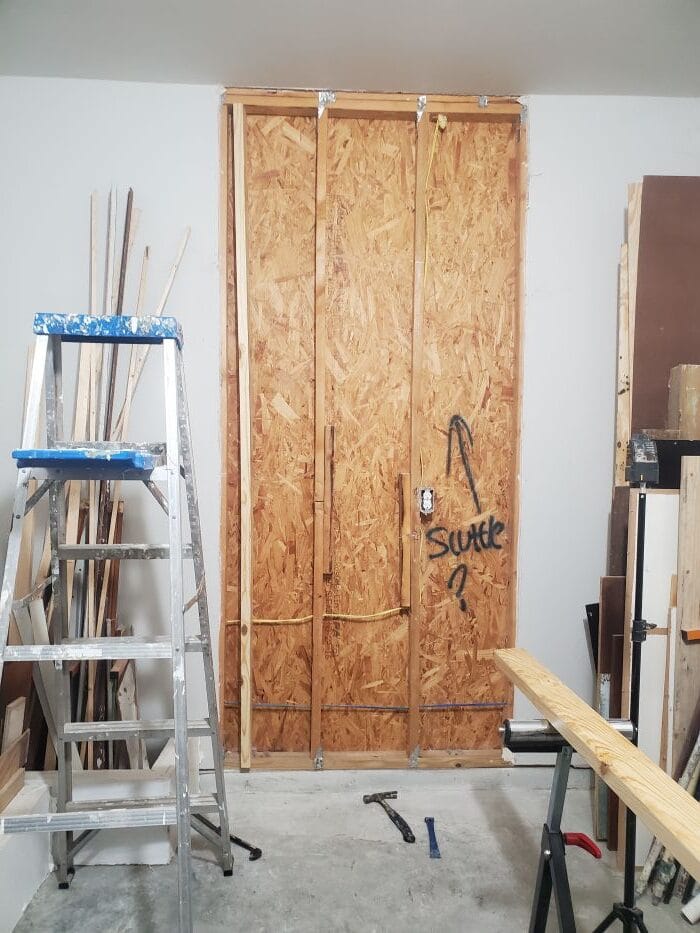
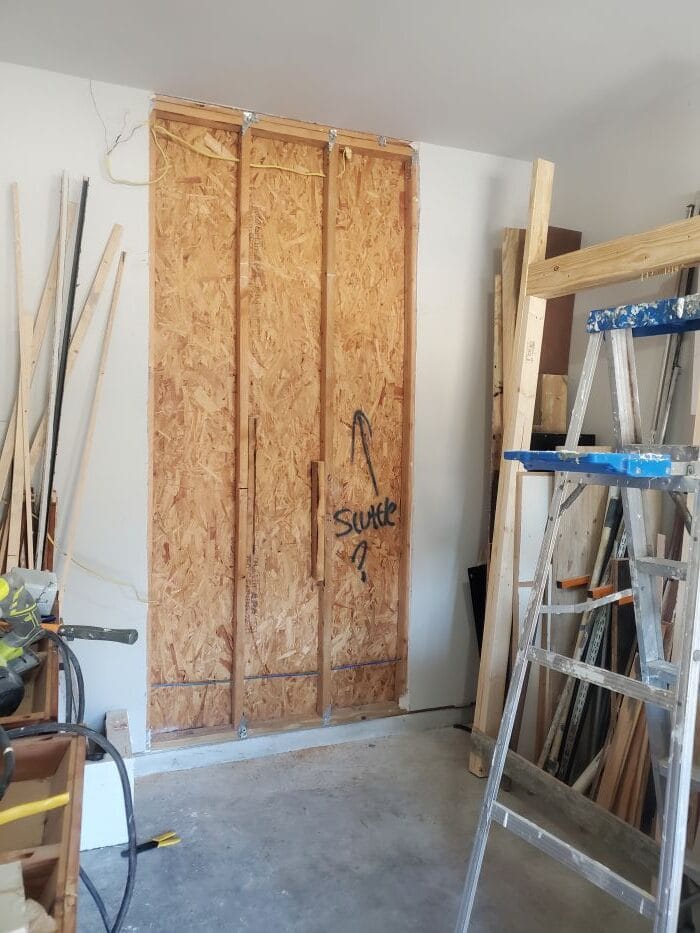

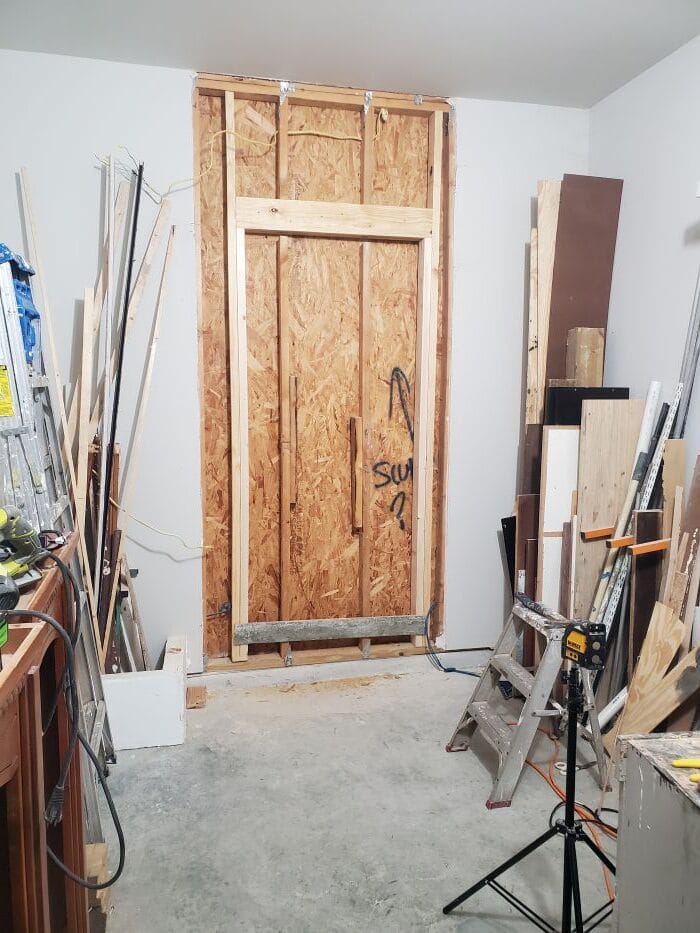
Step 3: Frame the Exterior Door Rough Opening
Before cutting through the exterior wall, the structural framing had to be prepared. This ensures that once the exterior materials are removed, the structure is already supported and to minimize the time of the unsecured opening with the exterior.
- Removed the upper portions of the two studs that would become part of the doorway
- Installed a header across the top to carry the load above the door
- Added side framing (jack studs) to define the rough opening
At this stage the full door frame was built, even though the exterior wall was still intact.
- Rough Opening Frame
- Dry-fitting exterior door
Step 4: Cut the Exterior Sheathing (OSB)
After framing the opening, it was time to start opening the wall.
- Used a reciprocating saw to cut through the OSB sheathing along the rough opening lines
- Carefully followed the interior framing as a guide
However, removing the panel was harder than expected. The OSB was attached to the brick veneer with brick hanger clips, small metal connectors that tie the wall together. The panel had to be carefully pried and wiggled loose. Eventually it separated without damaging the brick

Step 5: Remove the Brick Section
This was easily the hardest and most time-consuming step. The goal was to remove bricks carefully so they could be reused later. Process used:
- Drilled holes into mortar joints to loosen bricks
- Used a circular saw with diamond blade to cut mortar lines
- Knocked bricks out with a hammer and chisel
Challenges:
- The saw was not deep enough to cut fully through
- Each brick required multiple passes and chiseling
- Dust levels were extremely high
💡Pro Tip: Investing in a full-face respirator mask was essential for safety. The first few bricks took hours, but once the top rows were removed the process became easier. Removing the entire section took about two days.
 First Brick Removed
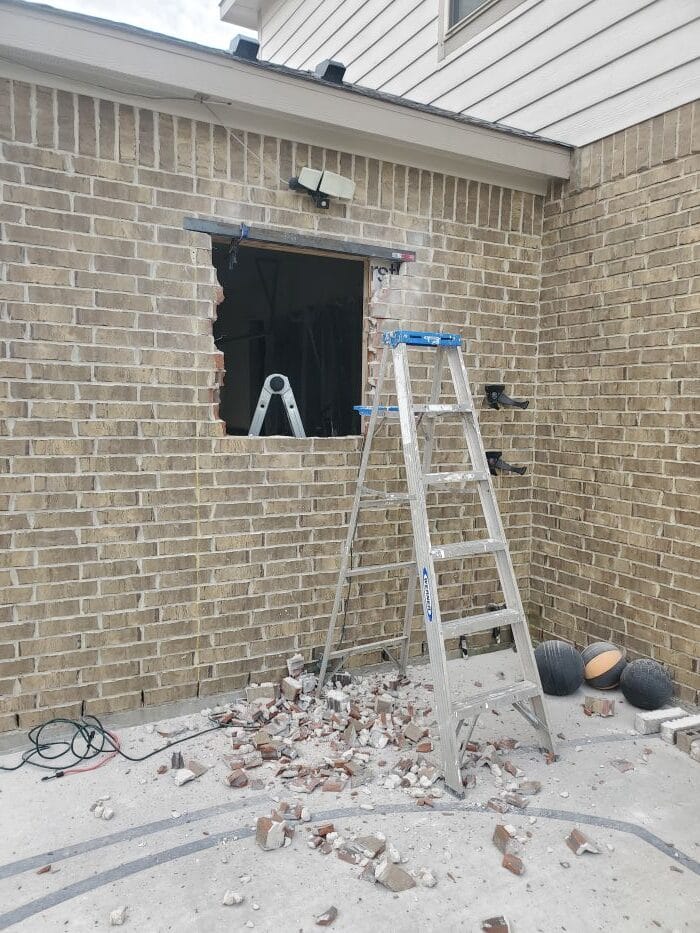 Progress
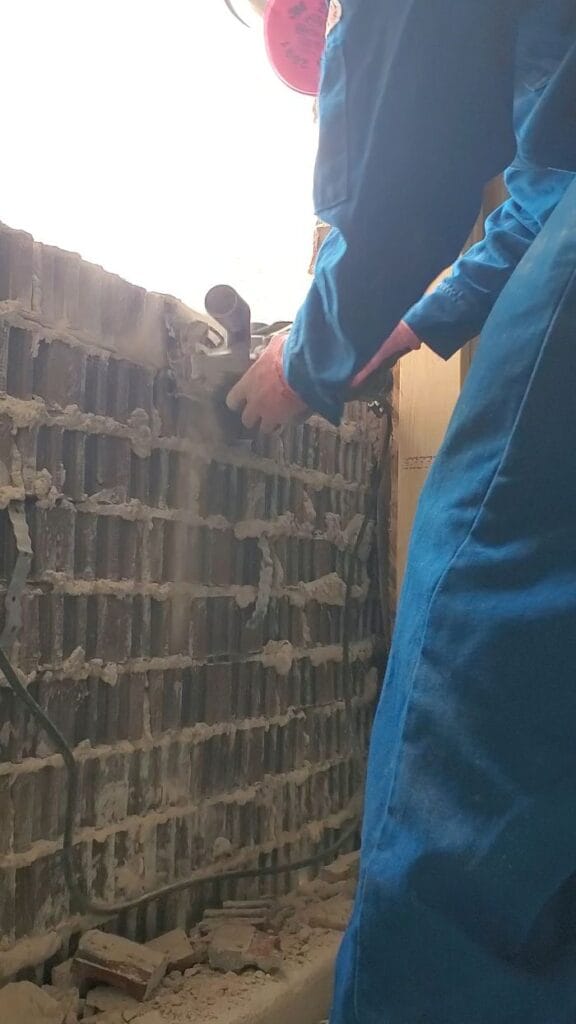 Cutting mortar lines with a small circular saw
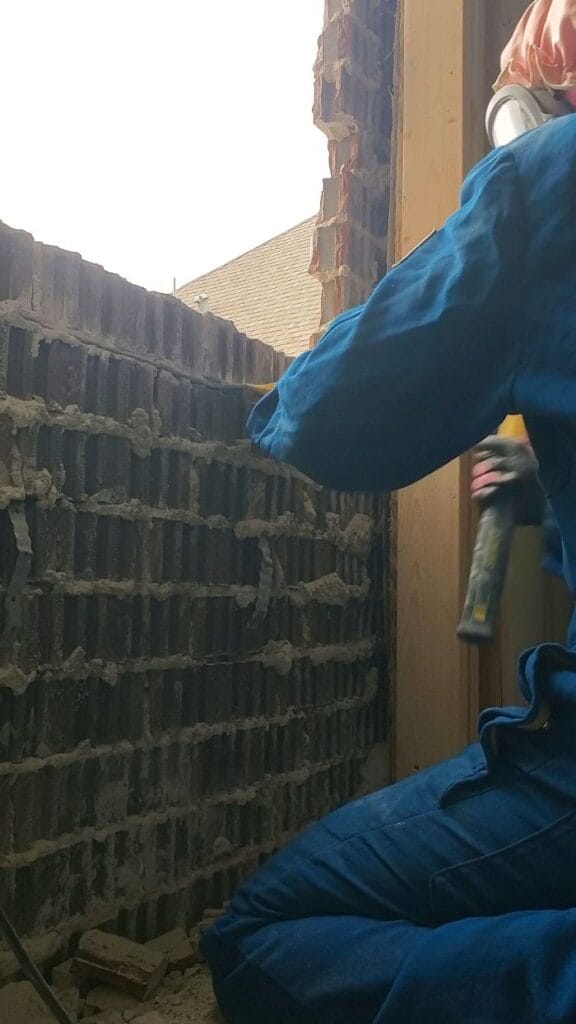 Knocking out bricks with hammer and chisel
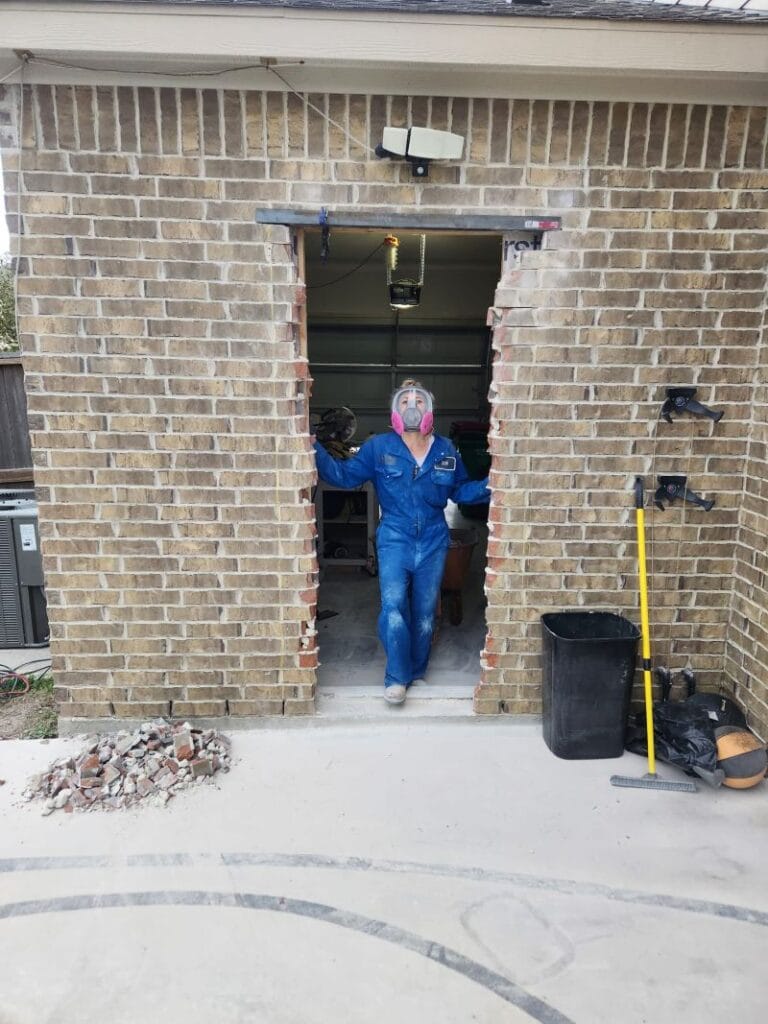
Step 6: Install Structural Support (Steel Lintel)
With the brick opening created, the next step was adding structural support. Without this support, the bricks above the door could shift or crack.
- Installed a steel lintel beam beneath the remaining top row of bricks
- The lintel spans across the door opening and carries the weight of the brick above
- Later the lintel was embedded into mortar to secure it permanently
 Lintel Brick support
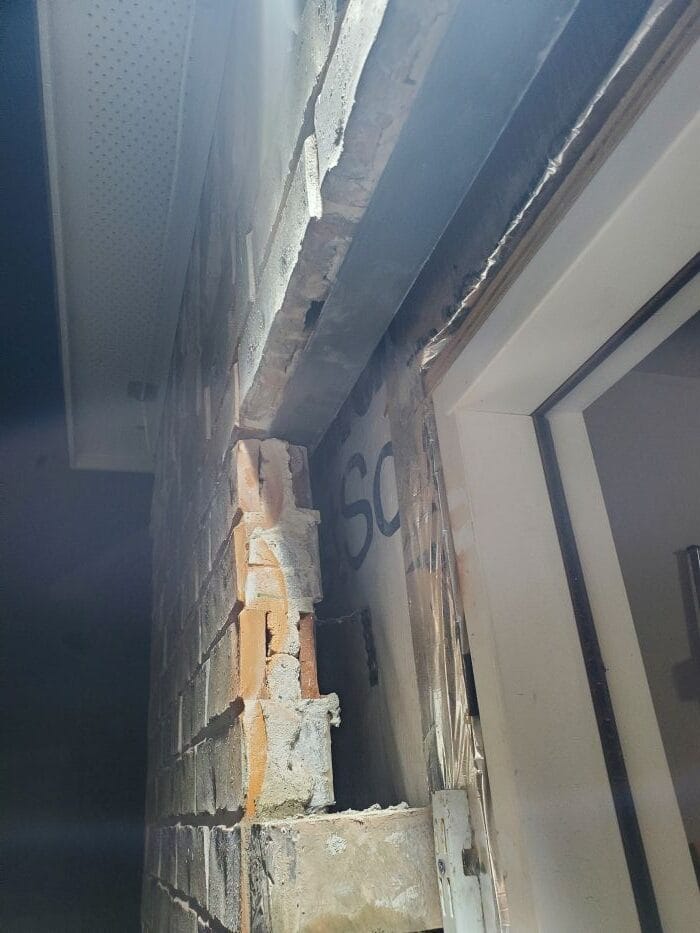 Lintel final installation
Step 7: Install the Doggy Door
Before the door was fully secured, I installed the doggy door.
- Used the template provided with the dog door kit
- Marked the cutout area on the steel door panel
- Cut the opening with a jig saw
- Installed the dog door frame and tightened screws from both sides
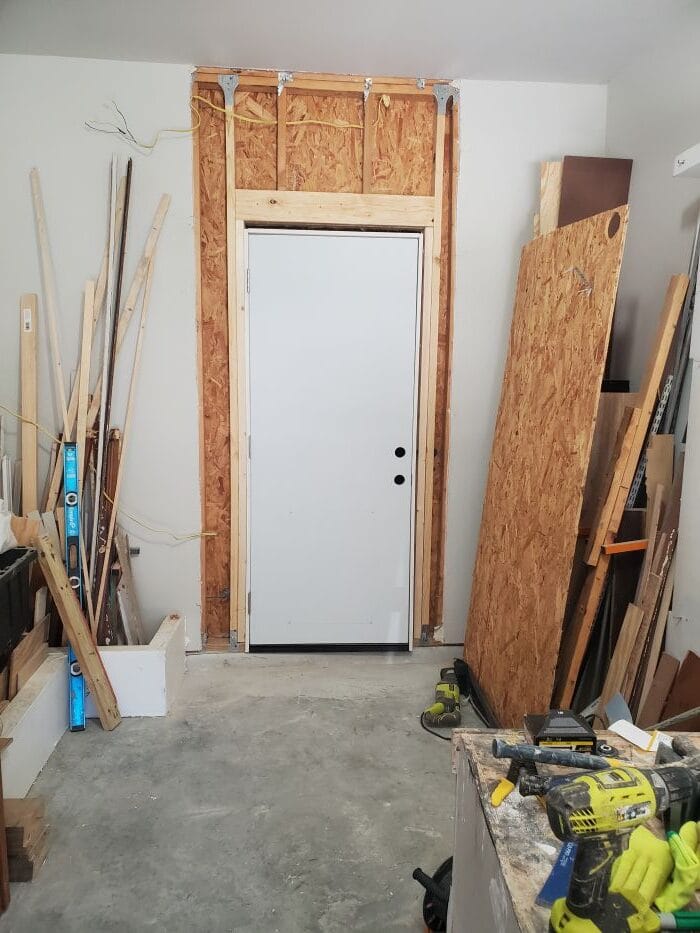
Step 8: Prepare and Install the Exterior Door
Before inserting the door, I prepared the opening for weather protection.
- Applied flashing tape around the entire rough opening
- Set the prehung exterior steel door into the frame
- Used shims to adjust the door until perfectly level and square
Steps included:
- Checking vertical alignment with a level
- Adjusting the hinge side first
- Securing the frame with screws through the shims
Doing this step alone made it slower, but eventually the door opened and closed smoothly.
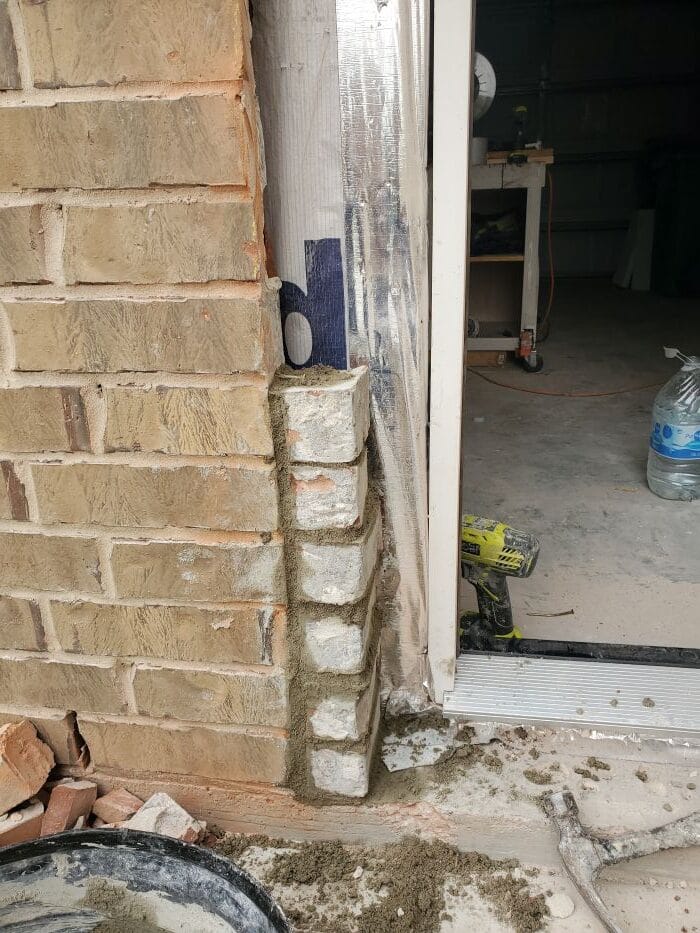
Step 9: Rebuild the Brick Around the Exterior Door
Originally I planned to rebuild the bricks in a staggered pattern, but that would have required extensive cutting.
Instead I chose a simpler method:
- Cut straight vertical lines along both sides of the door using the circular saw
- Created a clean edge in the existing brick wall
- Cut bricks into smaller pieces to fill the gap between door frame and wall. Cutting bricks worked really well with my wet tile saw, however due to the thickness of the bricks, I had to cut from both sides to make a cut thru the brick.
Installation steps:
- Stacked cut brick pieces vertically
- Secured them with mortar
- Inserted metal nails into mortar joints to tie the new bricks to the existing wall
💡Pro Tip: A metal straight edge helped maintain a clean, straight line.
 Bricks stacked
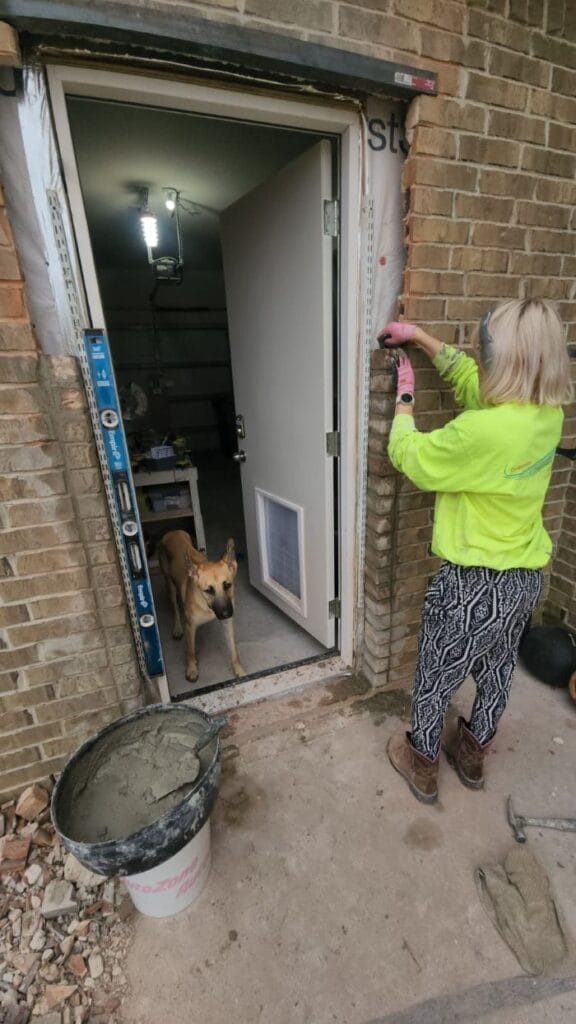 Guiding bricks with straight edge
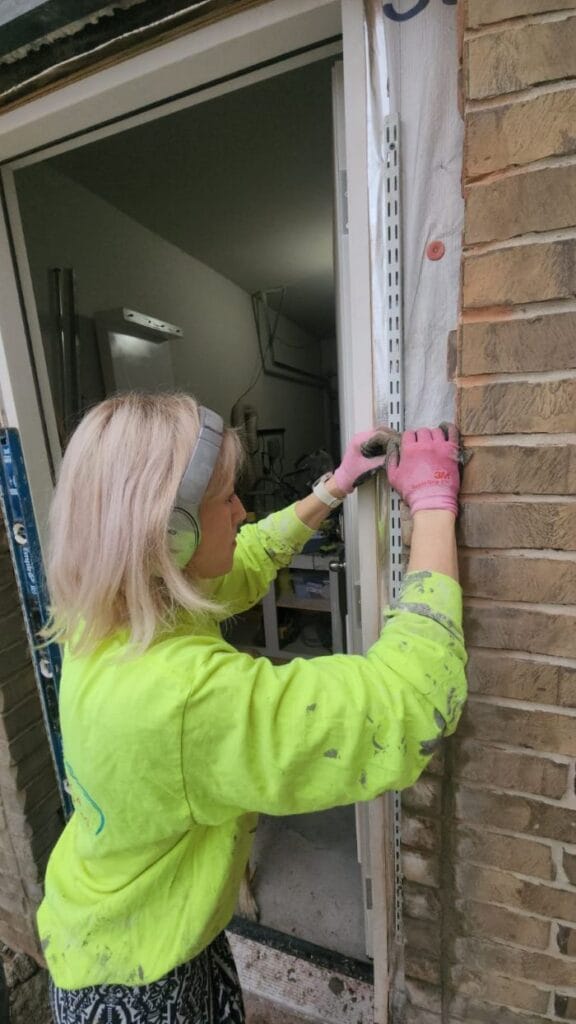
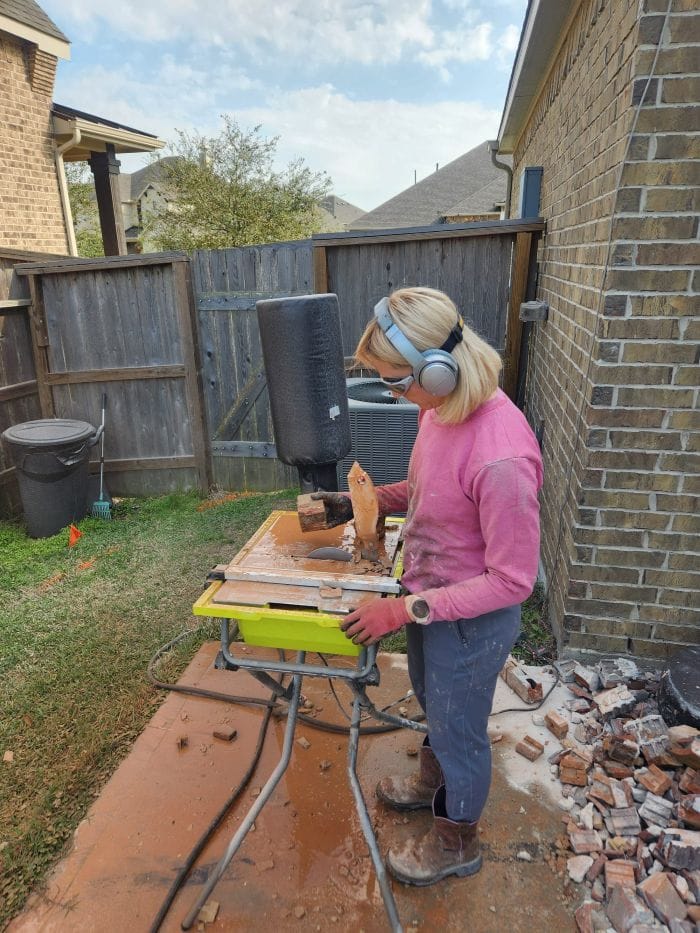 Cutting Bricks with wet saw
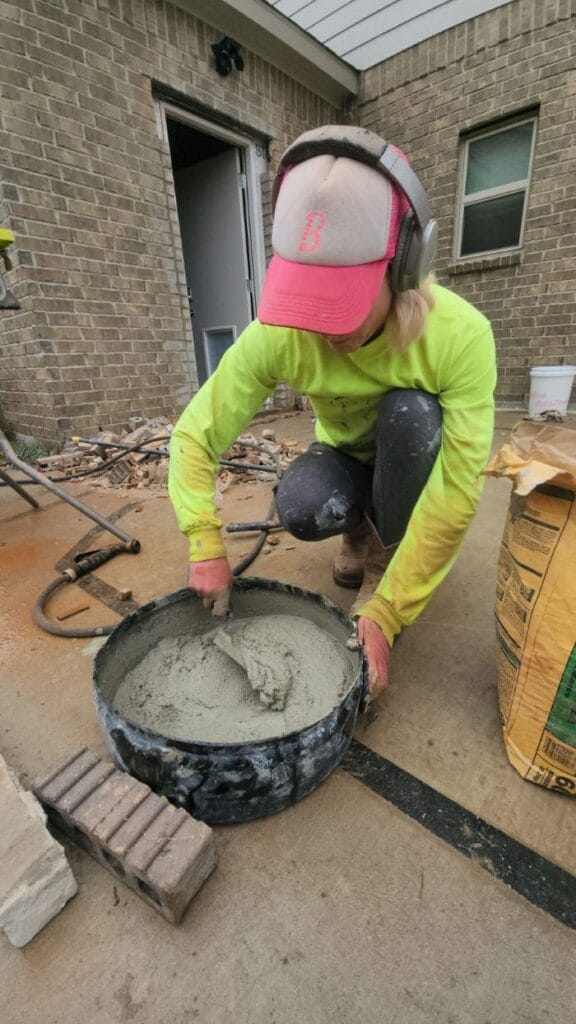 Mixing Mortar
Step 10: Finish the Exterior Door Details
Once the bricks were installed, the exterior finishing work began.
- Embedded the steel lintel into mortar. To allow moisture behind the brick veneer to escape, I also drilled weep holes into the mortar joints.
- Installed brick pieces at the base to create a small step
- Filled remaining gaps with brick trim
- Caulked around the door frame
- Painted the trim and door
- Installed Keyless lock
Important lesson:
💡Pro Tip: The door threshold must also be sealed. During the first rainstorm water leaked into the garage. After some troubleshooting I realized the threshold simply needed additional caulking.
 Installed door with trim
 Installed door with painted trim
Step 11: Finish the Interior Wall
The final stage was restoring the inside of the garage. Interior finishing included:
- Reconnecting the electrical wiring
- Installing the new exterior light fixture
- Closing the wall with drywall
- Applying joint compound and sanding
- Painting and installing door trim
Once completed, the door looked like it had always been part of the house.
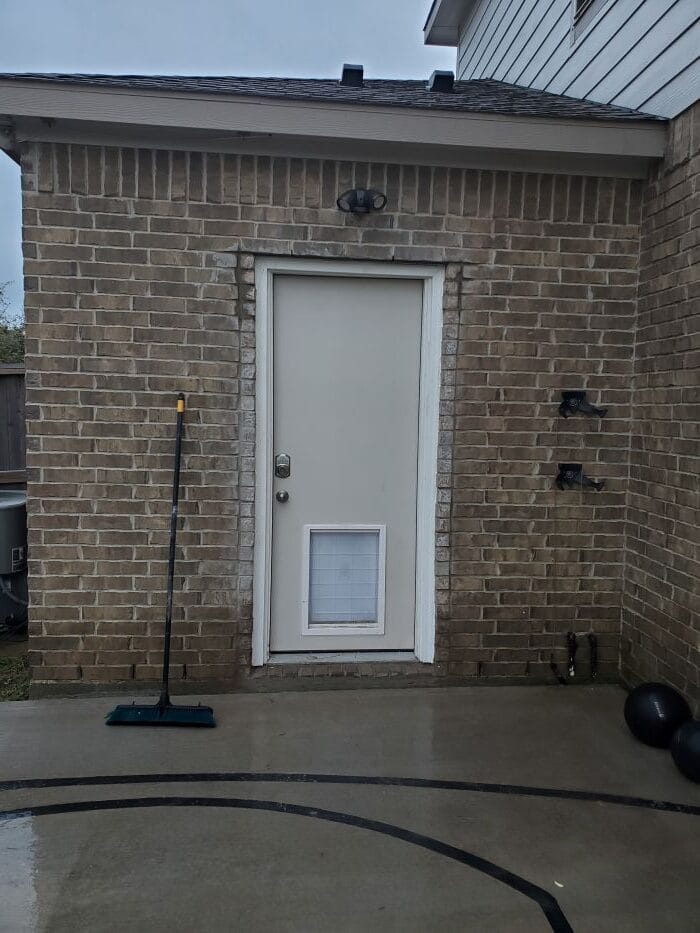
Finished Reveal / Results
This door has made daily life much easier. Now we can:
- Walk directly between the garage and yard
- Move tools and materials easily during projects
- Let the dogs go outside while still having shelter
Despite how challenging it was, I’m incredibly proud of this build—and I honestly can’t imagine the house without this door anymore.
Q&A, Pro-Tips
Q: Is this project beginner friendly?
A: Not really. Cutting exterior brick walls and installing structural framing requires advanced DIY experience.
Q: Why is a lintel required?
A: The lintel carries the weight of the bricks above the door opening.
Q: Could a contractor do this faster?
A: Probably yes, as they have the right tools and experience. I had to learn and troubleshoot all by myself with the tools on hand.
Related Projects
Want more ambitions DIY projects that provide solutions to common problems? Keep on reading: