DIY Stone Veneer Fireplace with Wood Mantel (Modern Upgrade on a Budget)
If your living room feels plain or lacks a true focal point, adding a fireplace can completely transform the space. Our builder-grade home had a long, rectangular living/kitchen area that felt empty and uninspired—so we set out to create a modern stone veneer fireplace with a stunning wood mantel and an archway to separate the kitchen form the living room. This project added architectural interest, warmth (visually and literally), and a custom look we absolutely love.
The build took about a weekend of work, cost significantly less than hiring it out, and requires only intermediate DIY skills.
Disclaimer: This post contains affiliate links. I may earn a small commission if you make a purchase, at no extra cost to you.
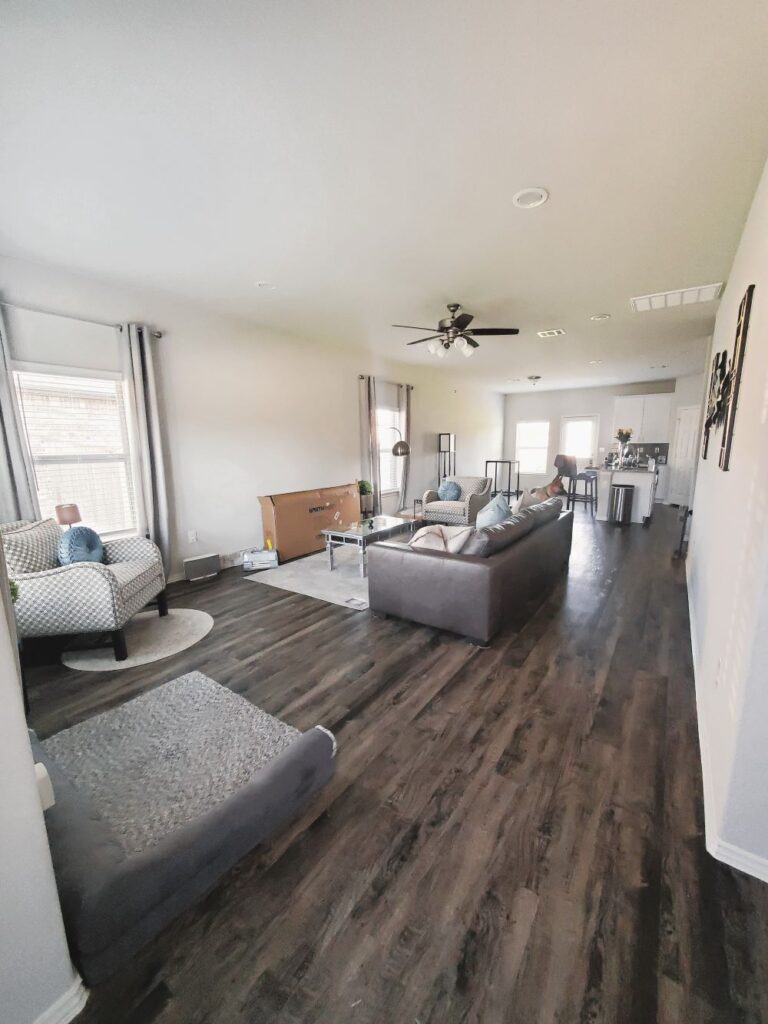 Living Rom Before
 Living Room After
Project Snapshot / Quick Facts
- Skill Level: Intermediate
- Time Requires: 2 Weekends
- Cost: ~$1500-$2000
Material & Tools List
Materials
- Cement Board (USG Durock)
- Cement Board Screws
- Electric Fireplace (Here 60″)
- Stone Veneer
- Mortar
- 2×4 studs for framing
- Wood Mantel (4×4 Pressure treated timber)
- Wood Screws
- Timberlok Screws
- Wood Stain (Here: Dark Walnut Varathane)
- Caulk
- Electric box and wiring (if relocating outlet)
Tools
- PPE (Hearing Protection, Gloves, Safety Glasses). Get my favorite (Pink) PPE from Amazon
- Studfinder (Amazon)
- Laser Level (Amazon)
- Measuring Tape (Amazon)
- Drill
- Mite Saw
- Trowel for mortar
- Caulking gun
- Sanding block (optional for mantel finishing)
Step-by-Step: DIY Fireplace
1. Plan & Choose Your Fireplace
First, we needed to decide on the type and size of the fireplace. We wanted an electric fireplace instead of a natural gas fireplace as the main purpose was to create a design feature in the room. Also, as it barely gets cold in Texas, a natural gas fireplace inside the house would be barely at use. We shopped around and found online a good priced 60″ electric fireplace at Home Depot which shipped for free.

2. Build the Fireplace Frame
- Build a vertical stud frame using 2×4 lumber. This acts as the foundation for the cement board, fireplace insert, TV mount, and mantel.
- Add extra studs where you know you’ll need support—especially for:
- The fireplace insert
- Mantel installation
- TV mount area
- Cement board seams
- Before securing it to the wall, reroute an existing electrical outlet to create a new outlet higher up behind the TV.
- Anchor the frame into the existing wall studs using wood screws.


3. Install the Cement Board
- Cut USG Durock cement board to size using a utility knife or cement board scoring tool. Tip: Wear a mask—cement board dust can be irritating.
- Attach the panels to the stud frame with cement board screws, making sure all seams land on studs for stability.
- Leave a small gap (⅛”) between boards to prevent cracking.
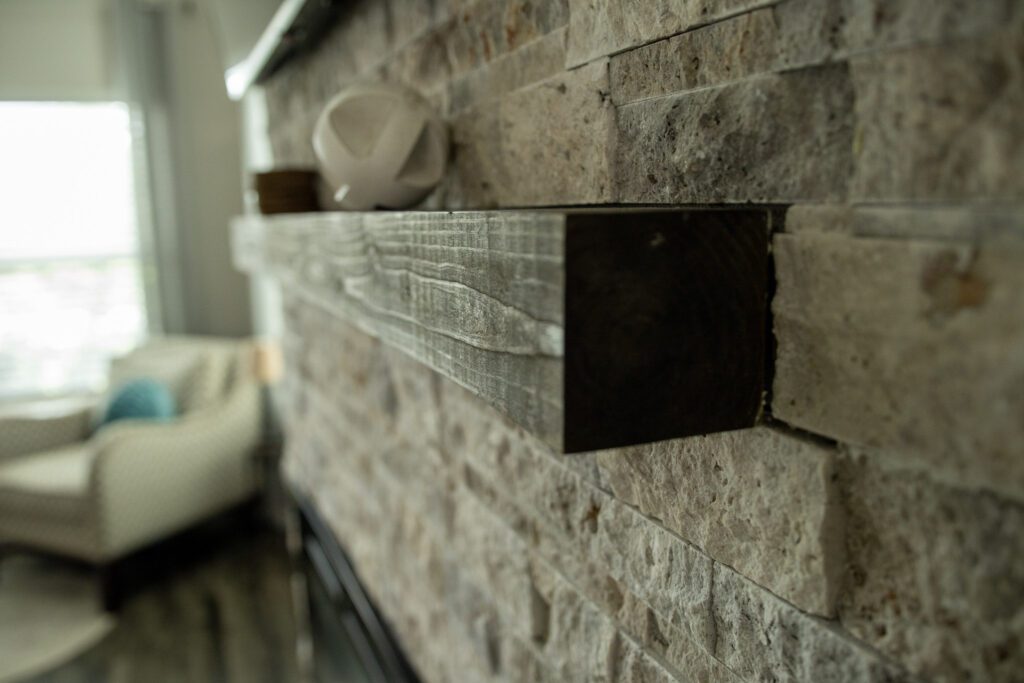
4. Build and Attach the Wood Mantel
- Cut the 4×4 pressure-treated timber to your desired mantel width. Tip: Sand the timber lightly before staining for a smoother finish.
- Test the placement before attaching.
- Use Timberlok structural screws to secure it directly into the framing.
- Ensure the mantel is perfectly level and strongly anchored—this piece becomes the visual anchor of the entire design.


5. Install the Stone Veneer
- Stone veneer is an investment, but its natural look is worth the cost. We found ours on sale at Lowe’s.
- Use a RYOBI wet tile saw to cut pieces—this ensures clean edges without chipping. It really cuts the stone smooth as butter.
- Mix MAPEI Ultralite mortar and apply it to the cement board using a notched trowel.
- Press each stone firmly into the mortar, working from bottom to top. Tip: Use a laser level as you build to ensure you stay perfectly aligned. Even a small drift early on will compound with each new row of tile, making the finished layout look uneven. If you notice any slight deviation, correct it right away by adding small spacers.
- Stagger your stones to avoid repeating patterns and keep the overall layout natural. Tip: Open and mix pieces from multiple boxes to ensure a blended, organic look on the wall.


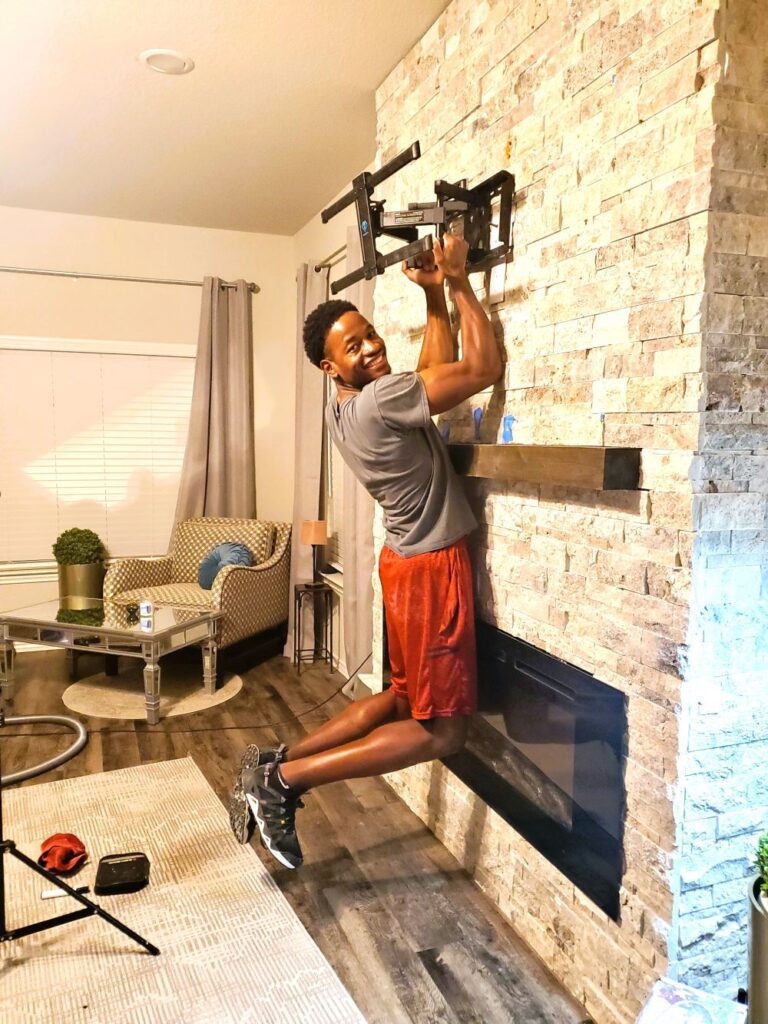
6. Stain, Install, and Finish the Fireplace
- After the mortar fully cures, stain the mantel using Varathane Dark Walnut for a rich, warm finish.
- Mount the TV bracket and install the TV.
- Slide in the electric fireplace insert and secure it according to manufacturer instructions.
- Caulk any small gaps where stone meets the side walls or ceiling for a professional finish.
- Clean off any mortar dust and step back to admire your brand-new focal point.
And here it is, our romantic, modern fireplace! It makes such a difference and immediately catches your eye when entering the house. Now, let’s add an archway to complete the look.
Q&A, Pro-Tips
Q: Can I attach stone veneer directly to drywall?
A: It’s not recommended. Cement board offers much better support and ensures long-term adhesion
Q: Would you do anything differently if you did it again?
A: I noticed that the 4×4 timber began to bend slightly over time. This is likely because we used pressure-treated wood that wasn’t fully dried. While it’s not obvious at first glance, it’s something to keep in mind. Still, the cost is only a fraction of what you’d pay for higher-grade lumber in that size.
Q: Any other tips before I start?
A: The most expensive part of this project was the stone veneer. If you’re working with a tighter budget, you could either build the entire fireplace from drywall with a smooth finish, or use cement board and apply a hand-troweled cement coating for a plaster-like look.
Related Projects
f you have an open-concept layout but still want some visual separation between the kitchen and living room, adding an archway might be a great solution. It’s another enjoyable DIY project that can save you thousands compared to hiring a contractor. Check out my post here.
Shop the Look
Create this cozy living room setup with the items (or similar) that brought this project to life: Shop my Livingroom