DIY Pantry Makeover: From Builder-Grade Shelves to a Smart, Space-Saving Storage System
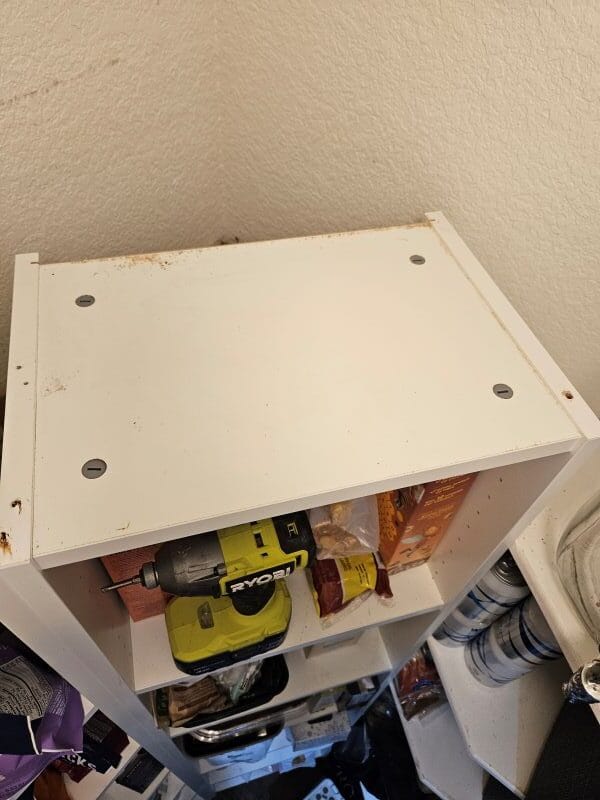
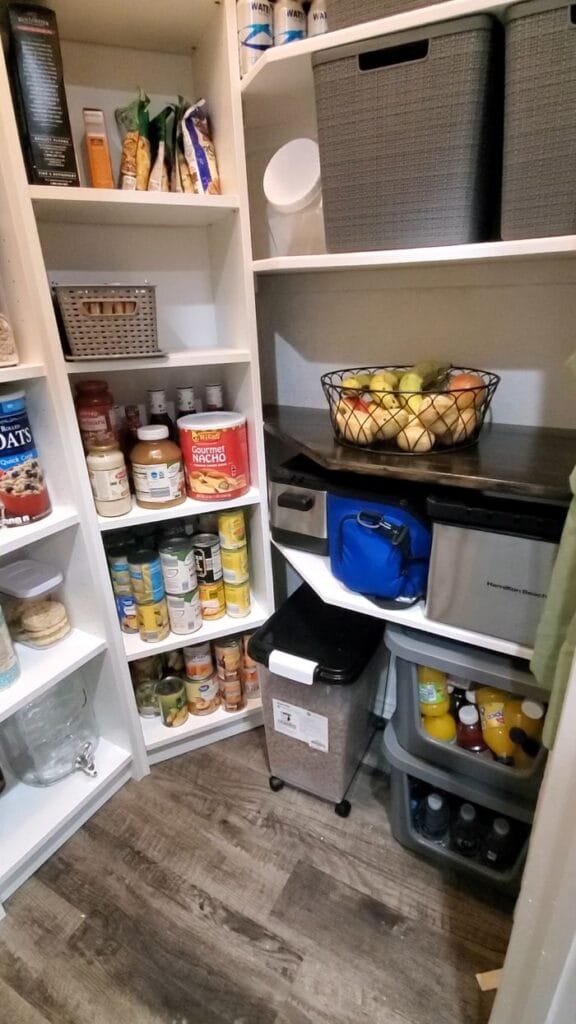
If you have a typical builder-grade corner pantry, you know the struggle. Three deep MDF shelves might look clean when empty—but once groceries move in, it quickly turns into stacked chaos and wasted space. We had the same problem. Items piled high, 50% of the vertical space unused, and organizing felt nearly impossible.
The goal was simple: maximize every inch of space and create a system that makes daily use effortless. With a hybrid DIY and store-bought shelving solution, we transformed our pantry into a highly functional, visually clean storage space—all in a weekend and on a budget.
Disclaimer: This post contains affiliate links. I may earn a small commission if you make a purchase, at no extra cost to you.
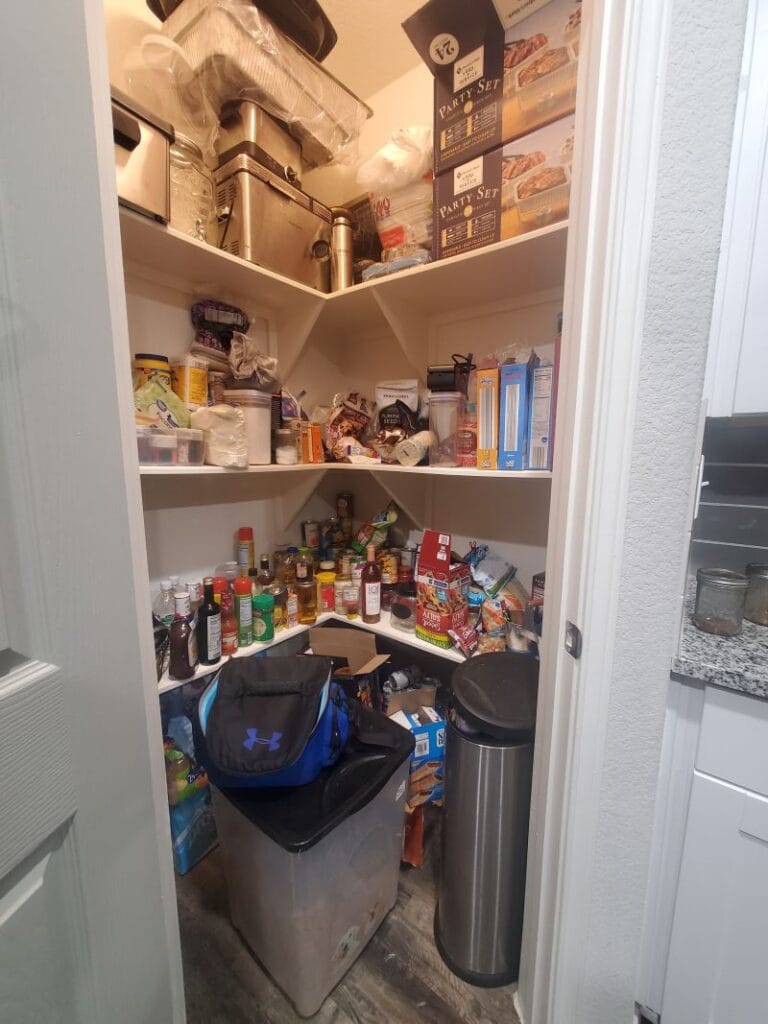 Pantry Before
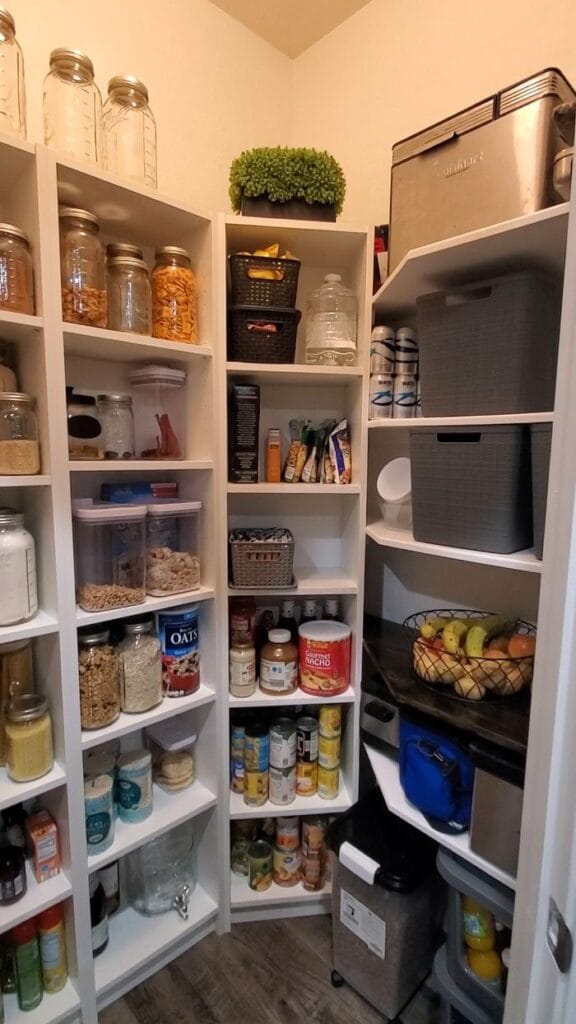 Pantry After
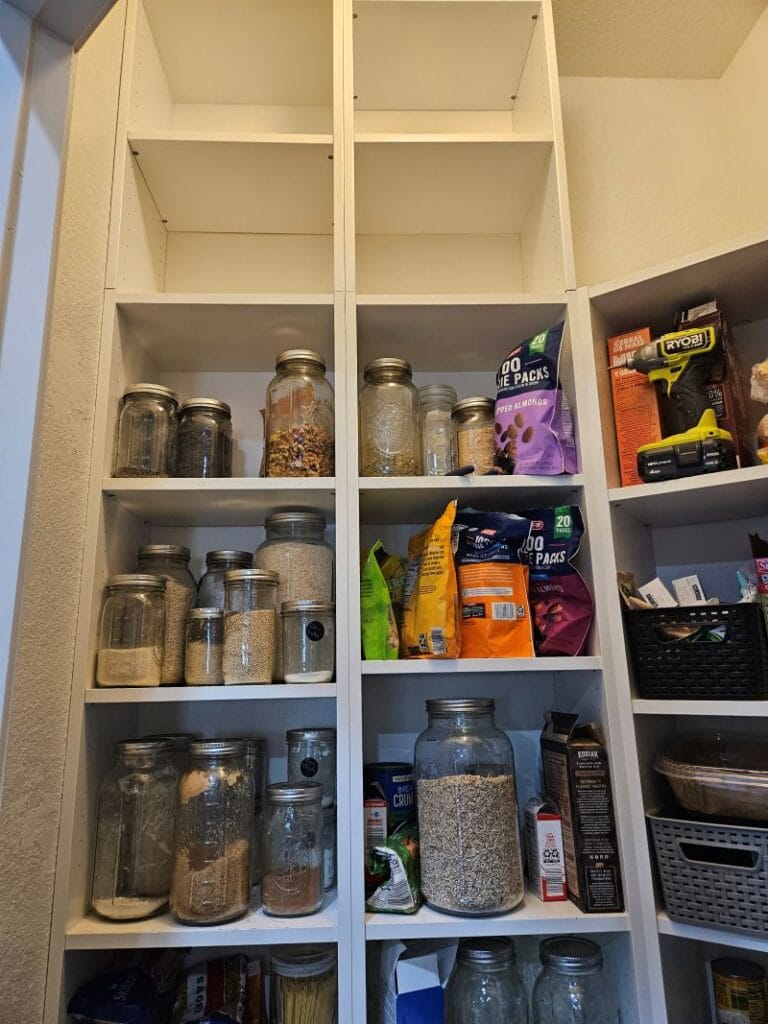
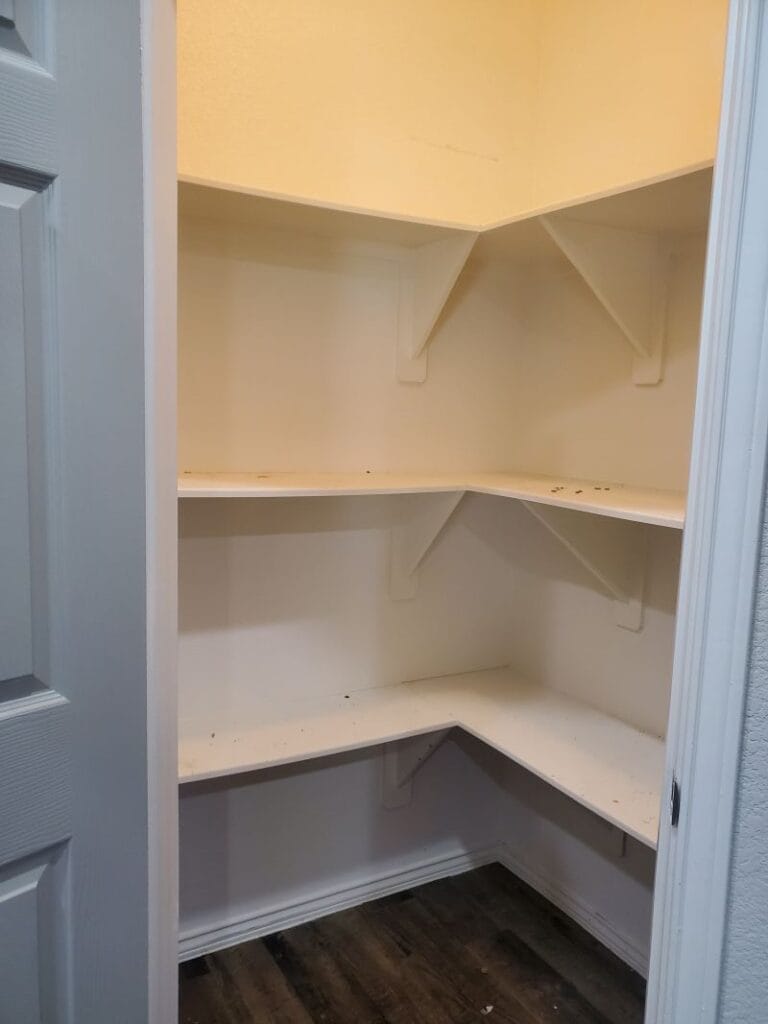
Project Snapshot / Quick Facts
- Skill Level: Beginner/ Intermediate
- Time Required: 1-2 Weekends
- Cost: ~$200–300
Materials & Tools You Absolutely Need for a Pantry Makeover
Materials
- IKEA Billy bookcases
- Existing MDF pantry shelves (reused & resized)
- Solid wood board (for counter surface)
- Dark walnut / ebony wood stain
- Polyurethane topcoat
- Mason jars (various sizes)
- Small plastic storage bins
- Screws
Tools
- Circular saw/ Table Saw
- Router (for edge detailing) (Amazon)
- Power drill
- Level
- Measuring Tape
- Sander
- Dowel Jig Kit (Amazon)
- Safety Gear (My pink PPE from Amazon)
Pantry Makeover (Step-by-Step)
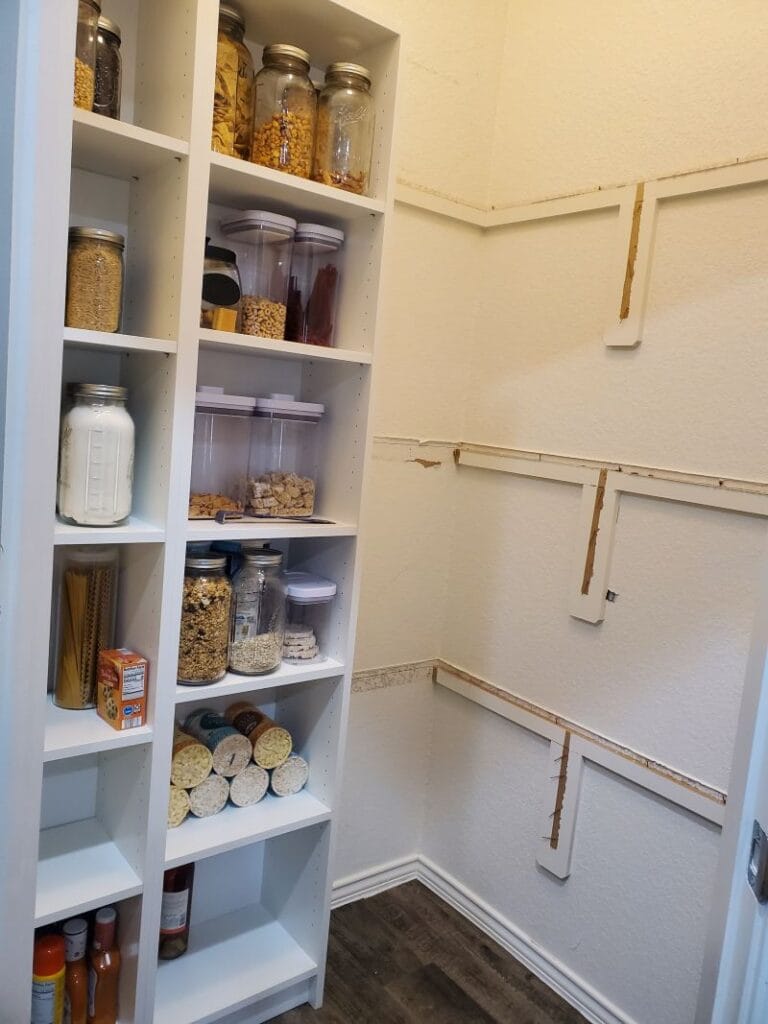
Step 1: Remove Builder-Grade Shelving
- Remove existing MDF shelves carefully so they can be reused. Tip: Save as much material as possible—you can repurpose it later to reduce cost.
- Patch and prep walls if needed.
Step 2: Install the Billy Bookcases
- Assemble three Billy bookcases from IKEA. Tip: The adjustable shelves are the secret weapon—customize heights based on what you actually store.
- Position them along the pantry walls to create a hybrid corner layout.
- Secure to studs for safety.
Step 3: Extend Shelves to the Ceiling
- Purchase a fourth Billy bookcase.
- Cut it into three sections.
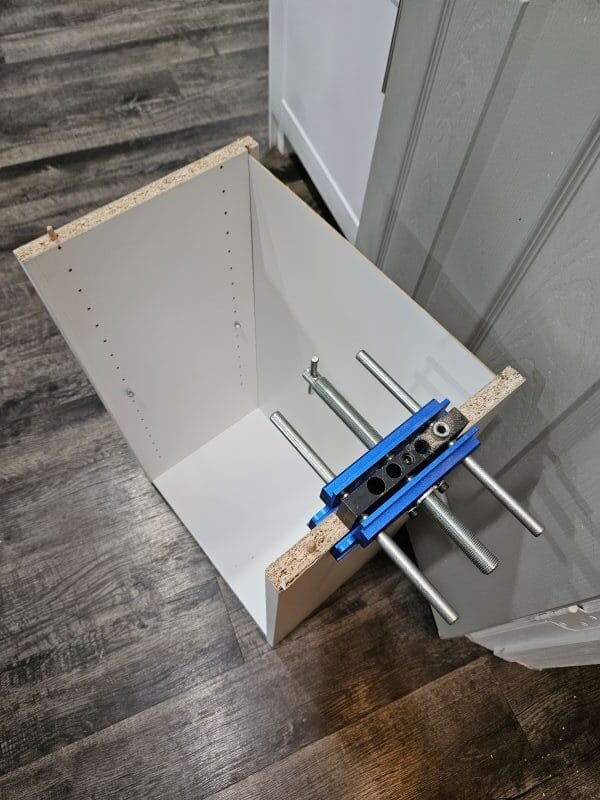
- Drill holes into the top of the bookcase and the underside of the added sections, then insert wood dowels to join and secure the pieces together. This step is simple to complete with a dowel jig kit (Amazon).
- Stack the sections on top of the installed bookcases to eliminate wasted space above.

- Dowel Kit

Step 4: Reuse and Resize Pantry MDF Shelves
- Cut the original MDF shelves to span from the wall to the bookcases.
- Use a router to round the cut edges so they match the original style. Tip: Slightly rounding edges makes DIY cuts look professional and intentional.
- Install them higher off the ground to leave room below for large containers.
 Angled Cut with the Table Saw
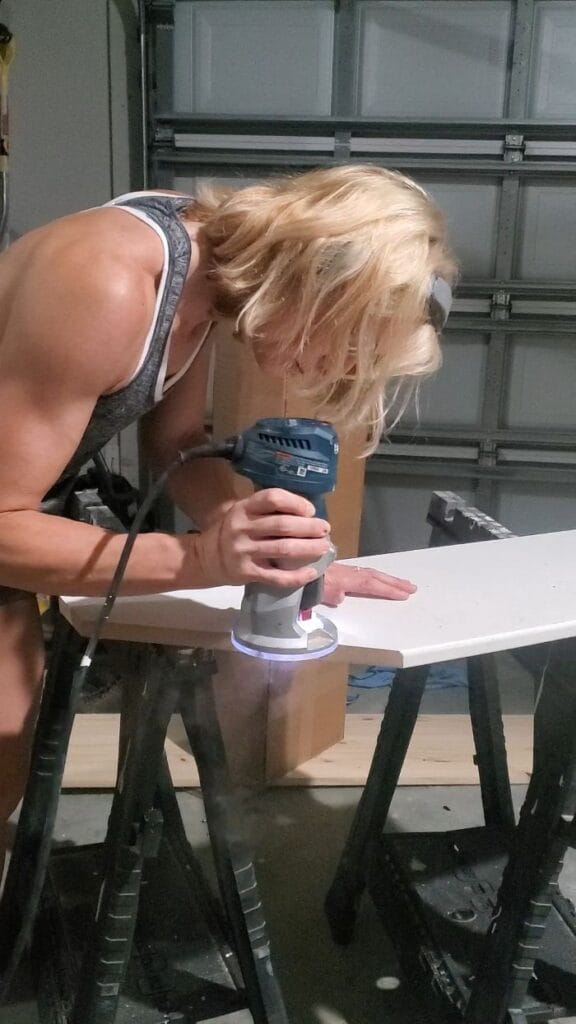 Rounding the edges with the router
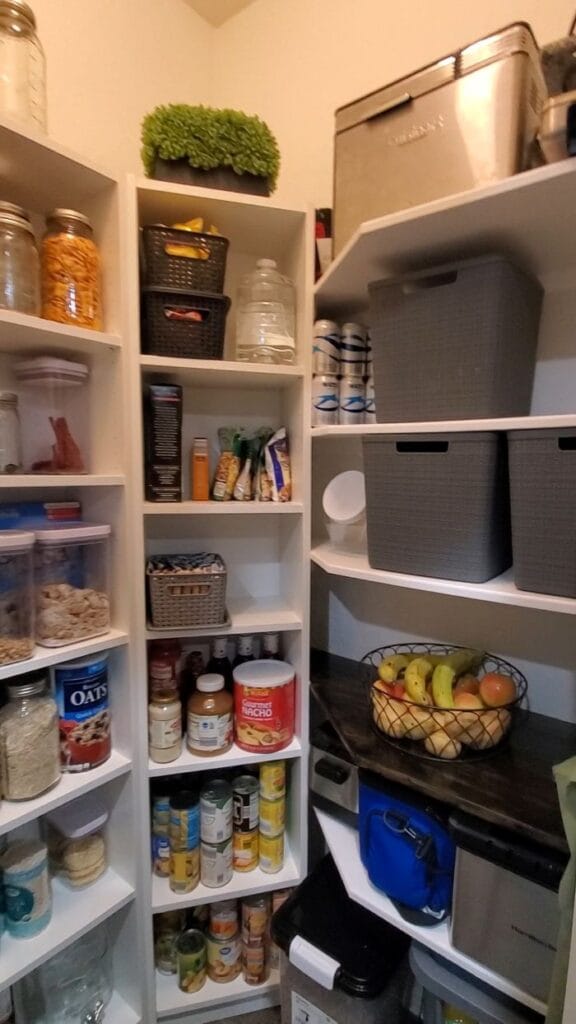
Step 5: Add a Custom Wood Countertop
This space is perfect for fruit baskets, potatoes, or small appliances—and visually ties into elements like your range hood and other wood accents.
- Install a solid wood board at counter height.
- Stain with dark walnut/ebony to complement your home accents. Tip: This adds warmth and transforms the pantry into a functional prep or drop zone.
- Seal with polyurethane for durability.
Step 6: Organize Pantry with Mason Jars & Storage Bins
- Transfer everyday staples (rice, noodles, flour, sugar, oats, seeds) into mason jars. Tip: Glass mason jars are durable, dishwasher-safe, and create a clean, cohesive look.
- Store overflow in small plastic bins neatly behind or below.
- Dedicate individual shelves for categories: noodles, baking, breakfast, seeds, etc.
- Lower open space below MDF shelves is perfect for Recycling bins, Dog food containers, Bulk storage items.
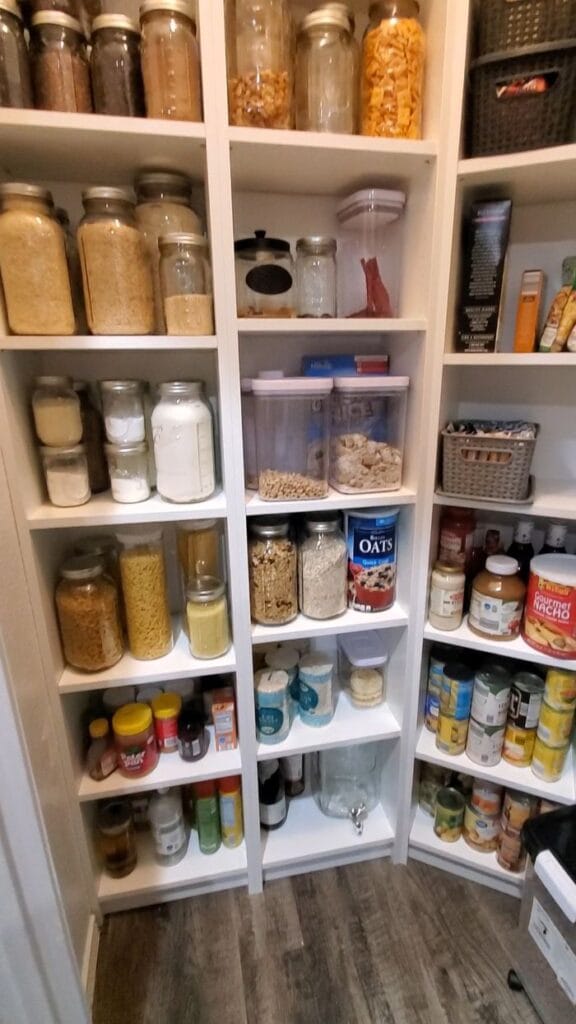


This transformation completely changed how we use our pantry. Everything has a place. The vertical space is fully utilized. Daily-use items are visible and accessible. And best of all? It stays organized longer.
The Billy bookcases allow easy grouping—noodles on one shelf, baking on another, breakfast items together—creating a system that’s simple to maintain.
DIY Pantry Makeover Q&A, Pro Tips
Q: Why use Billy bookcases instead of custom cabinetry?
A: Cost and flexibility. They’re affordable, adjustable, and easy to modify.
Q: Do mason jars really hold up long term?
A: Yes. They’re durable, dishwasher-safe, don’t fade, and resist cracking far better than many plastic containers.
Q: How do you keep it organized long term?
A: Category-based shelving and refill bins make maintenance simple. Once jars run low, refill from backup storage.
Related Projects
Looking to further upgrade your kitchen? Check out my related projects:
Shop the Look
Check out all of my home organization finds on Amazon