DIY Ceiling Beams on a budget (Perfect for Long, Boxy Rooms)
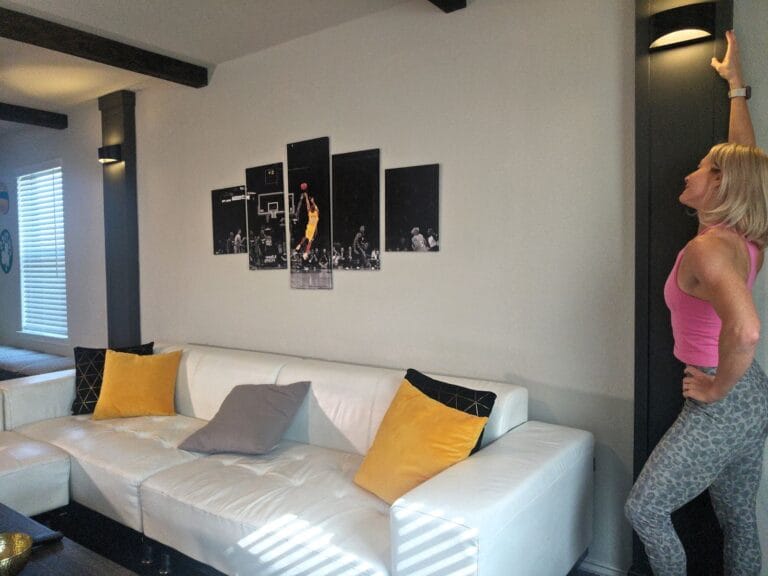
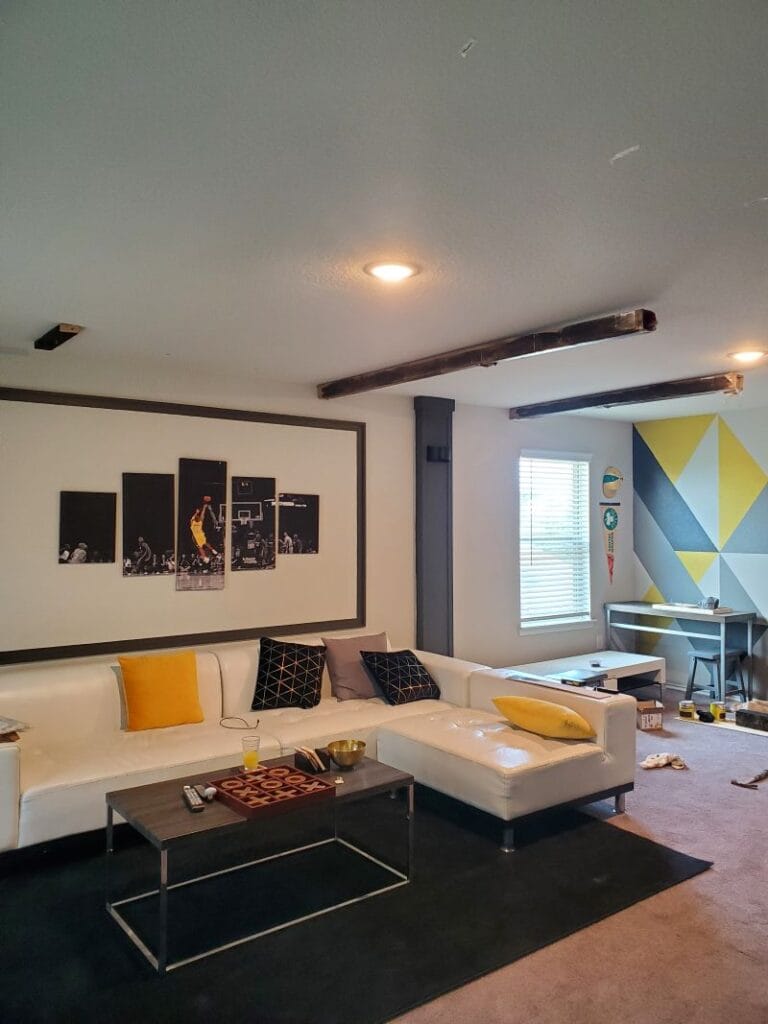
Our game room has gone through quite a transformation. After adding theater-style columns, a custom media console, a built-in concession stand, and an artsy accent wall, the space finally felt cohesive. Still, something was missing. Architecturally, the room felt long and boxy, especially with an 8-foot ceiling that stretched endlessly from one end to the other.
That’s when I started thinking about ceiling beams. Even with lower ceilings, beams can visually break up long spans and add warmth and character—if done right. With wood prices being what they are, I knew I had to approach this creatively. The solution? Budget-friendly faux beams made from ¼-inch plywood. Lightweight, affordable, and surprisingly convincing.
Tired of reading? Watch the transformation on Instagram.
Disclaimer: This post contains affiliate links. I may earn a small commission if you make a purchase, at no extra cost to you.
 Prototype Beams
 Final Beams
Project Snapshot / Quick Facts
- Skill Level: Intermediate
- Time Requires: 2-3 Weekends
- Cost: ~$50
Material & Tools List
Materials
- 1/4″ Plywood sheet
- Wood stain (Here Ebony and Dark Walnut from Varathane)
- Sanding Pads
- Brad nails
- Wood Glue
- Wood Putty
- Wood Screws
Tools
- PPE (Hearing Protection, Gloves, Safety Glasses). Get my favorite (Pink) PPE from Amazon
- Measuring Distance Meter (Amazon)
- Line Laser Level (Amazon)
- Studfinder (Amazon)
- Table Saw
- Circular Saw
- Sanding block
- Nail Gun
- Drill
Step-by-Step: DIY Faux Ceiling Beams
Step 1: Visualizing the Beams With Cardboard Templates
Before committing to anything permanent, I needed to see how beams would actually feel in the space—especially with only an 8-foot ceiling. To test the idea, I taped cardboard boxes to the ceiling, roughly mimicking the size and spacing of the beams.
Instantly, the room felt more intentional. The long ceiling was visually broken up, and the space gained architectural interest without feeling lower or cramped. That quick mock-up was all the confirmation I needed to move forward.
Step 2: Designing Budget-Friendly Hollow Beams
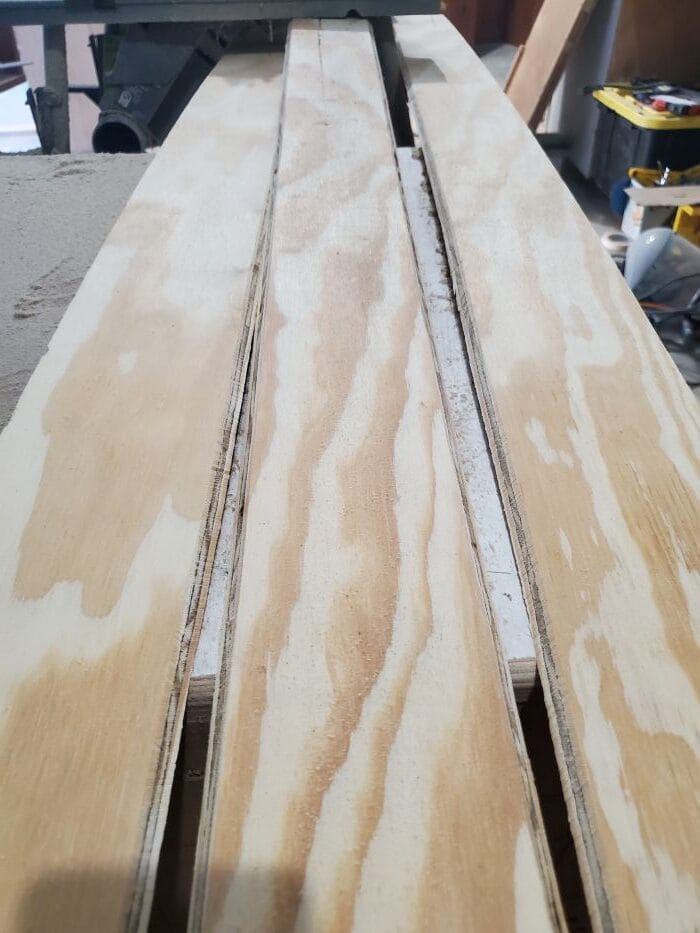
Because solid wood beams would have blown the budget, I decided to build hollow faux beams using inexpensive ¼-inch plywood. The goal was to create beams that look substantial but remain lightweight and affordable.
I ripped a full plywood sheet into 4-inch-wide strips, cutting the edges at a 45-degree bevel. This allowed the pieces to assemble cleanly without exposing raw plywood edges, creating the illusion of a solid wood beam.
Working with ¼-inch plywood at a bevel was a bit tricky—it’s much easier with thicker material—but with patience, it worked surprisingly well.


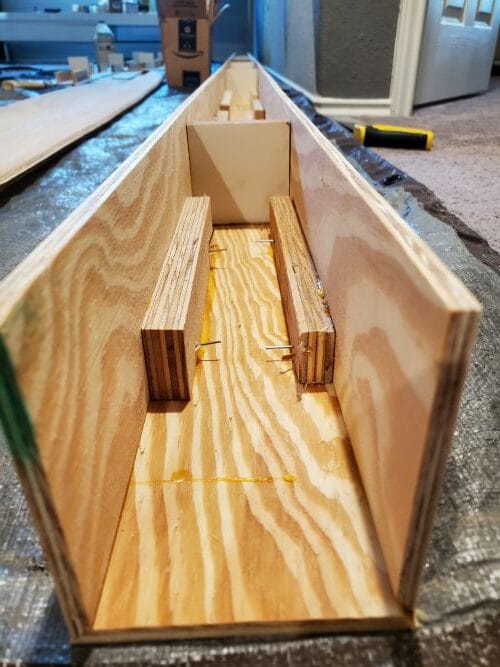
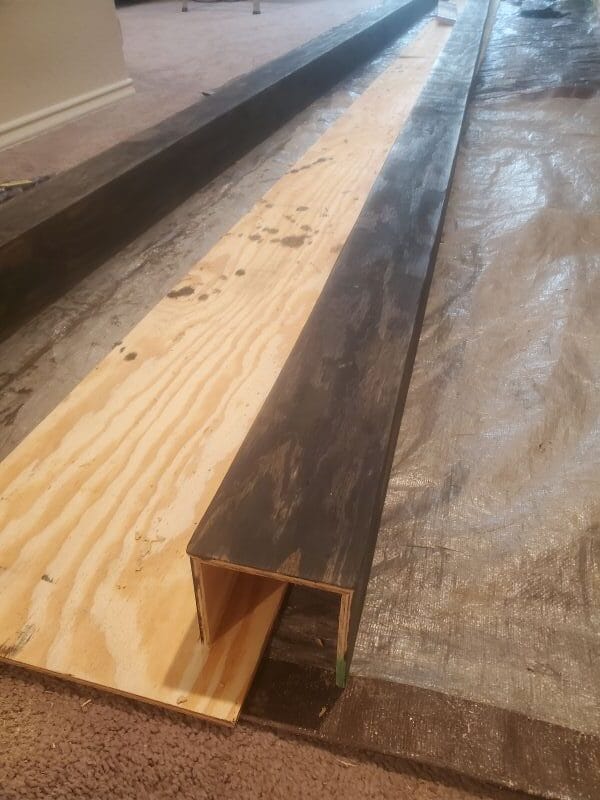
Step 3: Building Extra-Long Beams (14 Feet!)
Since each beam needed to span about 14 feet, I had to join multiple plywood sheets together. To keep everything aligned and strong:
- I glued the seams carefully
- Used leftover scrap wood along the inside seams
- Secured everything with wood glue and brad nails
To maintain a perfect 90-degree shape, I added about three small wooden square blocks inside each beam. These acted as internal braces and helped the beam keep its form during assembly and installation.
 Inside the hollow beam: Scrap wood
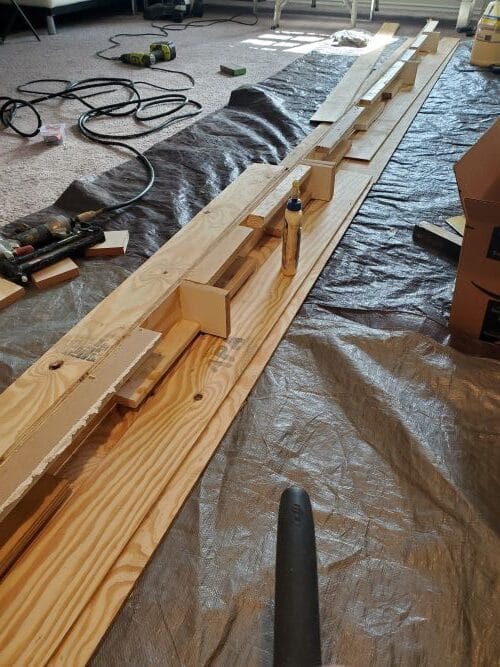
 Securing plywood strips with brad nails
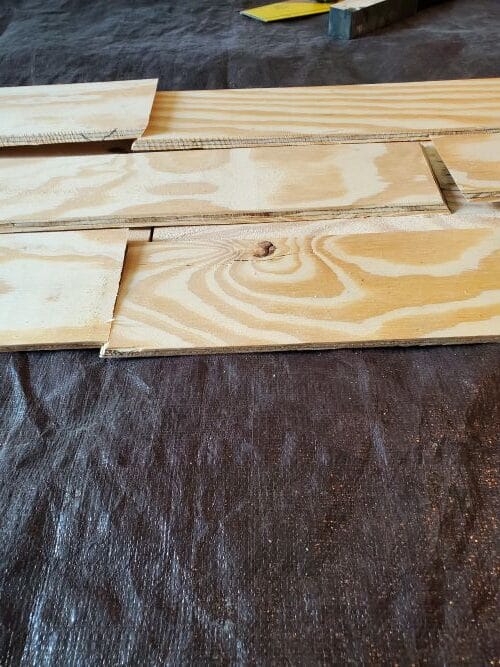 Joint of plywood sheets with beveled cut
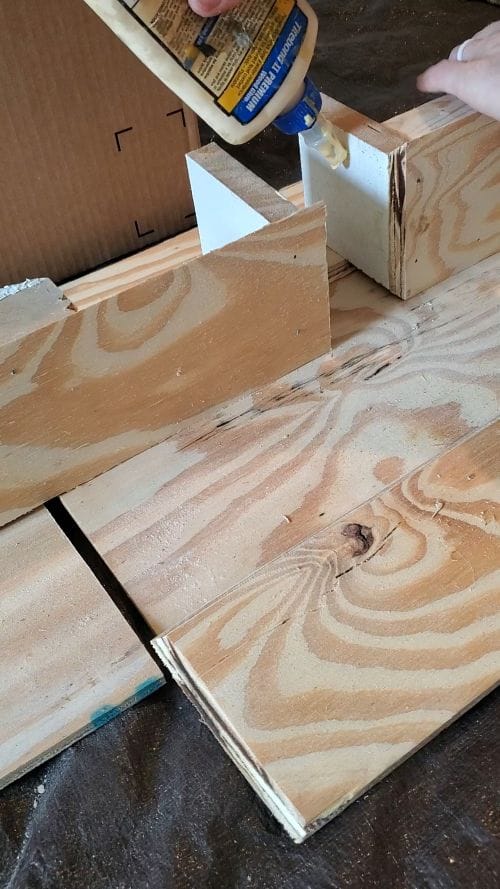 Joint of two plywood sheets using wood blocks
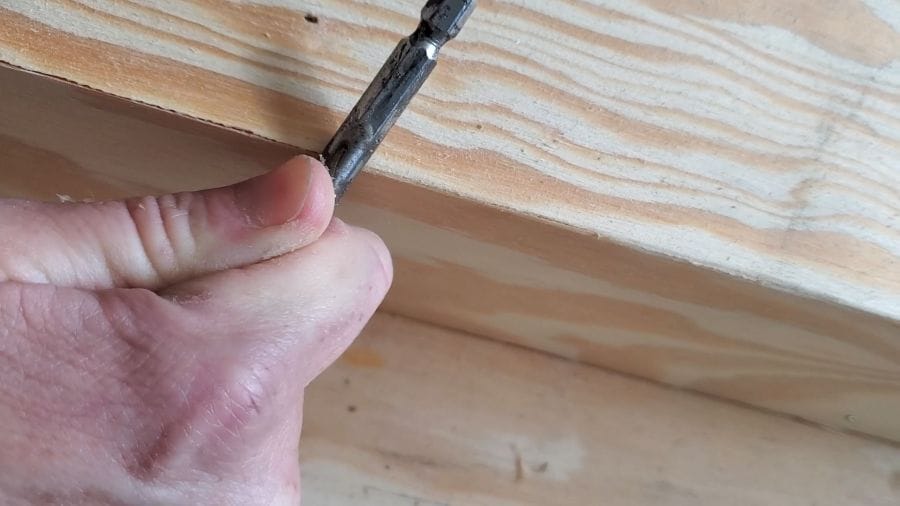
Step 4: Smoothing Rough Edges (Cheap Wood Trick)
Because I didn’t use premium plywood, some of the edges were rough at first. Instead of filling everything with putty, I used a simple trick: a round screwdriver handle.
By rolling it firmly along the edges with pressure, the plywood compressed slightly and created a subtly rounded, smooth edge. Any small gaps left I filled with wood putty. Once stained, the seams looked fused—almost like a solid piece of wood rather than layered plywood.
Step 5: Staining the Beams
Once assembly was complete, I stained the beams using my favorite Varathane Ebony and Dark Walnut stains. The combination added depth and warmth while helping disguise the plywood layers even more.
After staining, the beams already looked far more expensive than the materials used to build them.
Step 6: Planning the Beam Layout on the Ceiling
I had a rough idea of where I wanted the beams to go, but alignment was key. Since faux beams still need real support, I had to make sure they lined up with the actual ceiling beams (studs), which ran in the same direction.
Using a studfinder and laser level, I marked the exact path of the ceiling beams across the ceiling. This step ensured everything would be straight, symmetrical, and securely anchored.
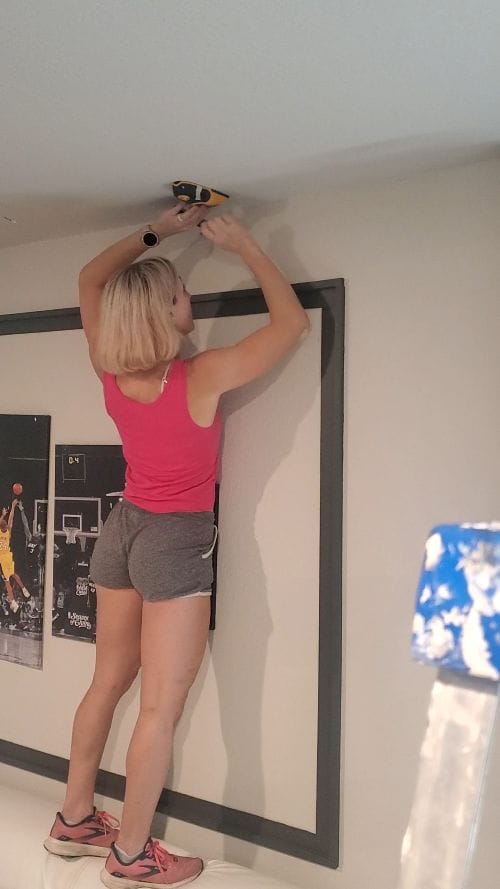 Locating the ceiling beams (studs)
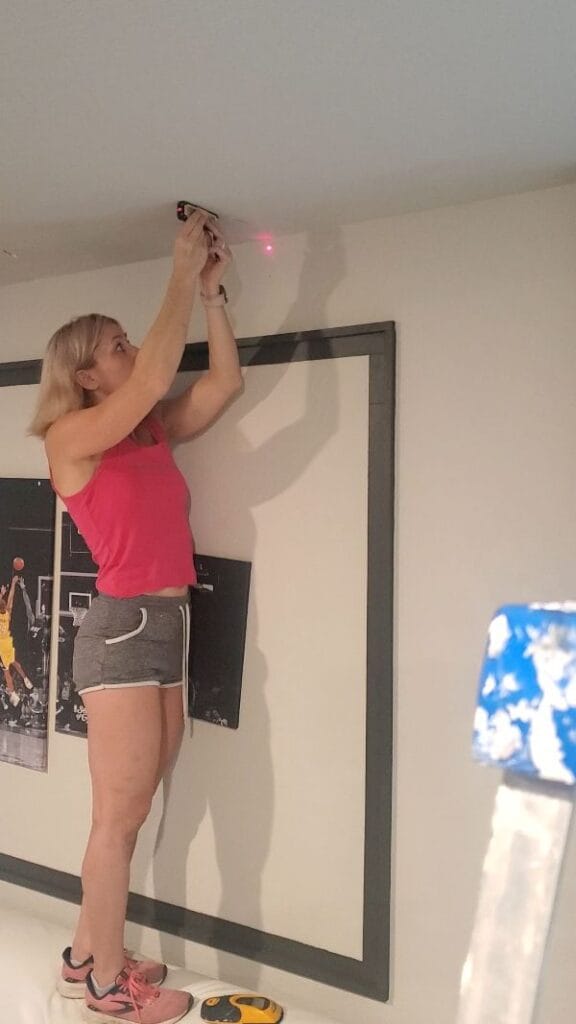 Measuring the distance from wall to wall with a laser measuring device
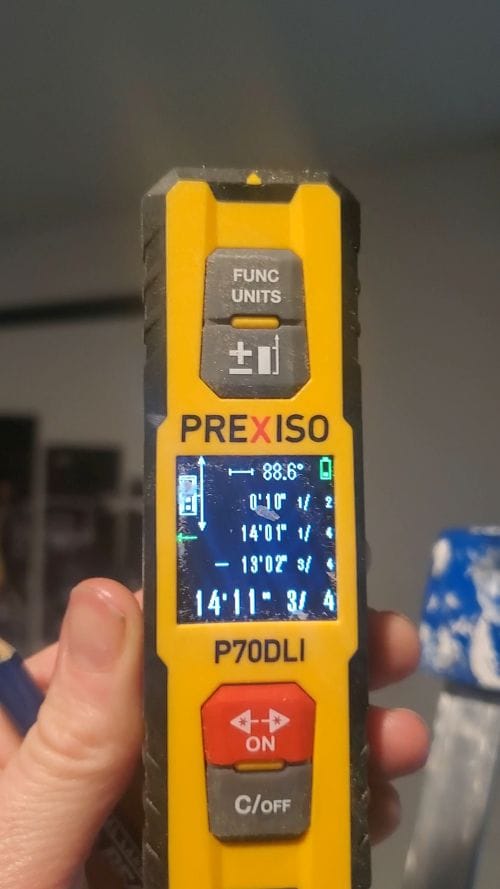
Step 7: Installing the Beams (Solo-Friendly Method)
Along the marked path, I installed several pieces of thick scrap wood, screwing them directly into the ceiling beams. These scrap pieces matched the width of the hollow beam and acted as hidden mounting cleats.
Before installing anything on the ceiling, I measured the exact length needed for each beam. Since these beams span nearly 14 feet, accuracy was crucial. I used a laser measuring device, which made measuring such long distances quick and incredibly precise.
Once I had the exact measurements, I cut each hollow beam to size on the floor before moving on to installation.
With the supports in place, installation was surprisingly simple. I lifted the hollow beam over the scrap wood and secured it using brad nails.
Since I was working alone—and didn’t feel like waiting for my husband to help 😊—I built a small temporary support platform. This allowed one end of the beam to rest in place while I attached the other end to the mounted wood pieces.
Luckily, the ceiling was very straight, and the beams fit snugly enough that no caulking was needed to fill gaps.
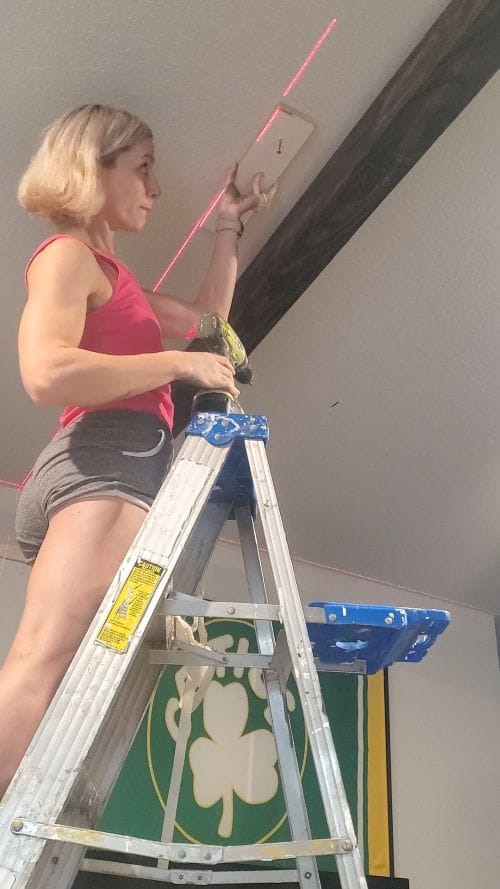 Installing the mounting cleats
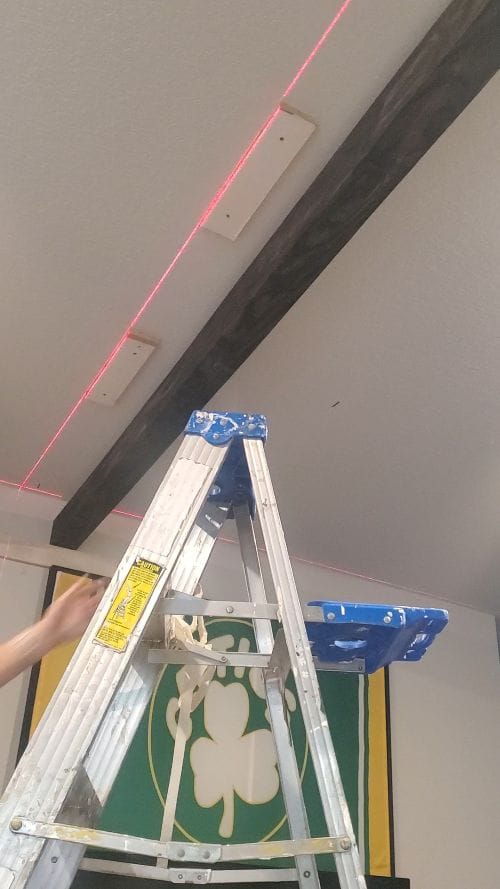 Laser Line to help install cleats
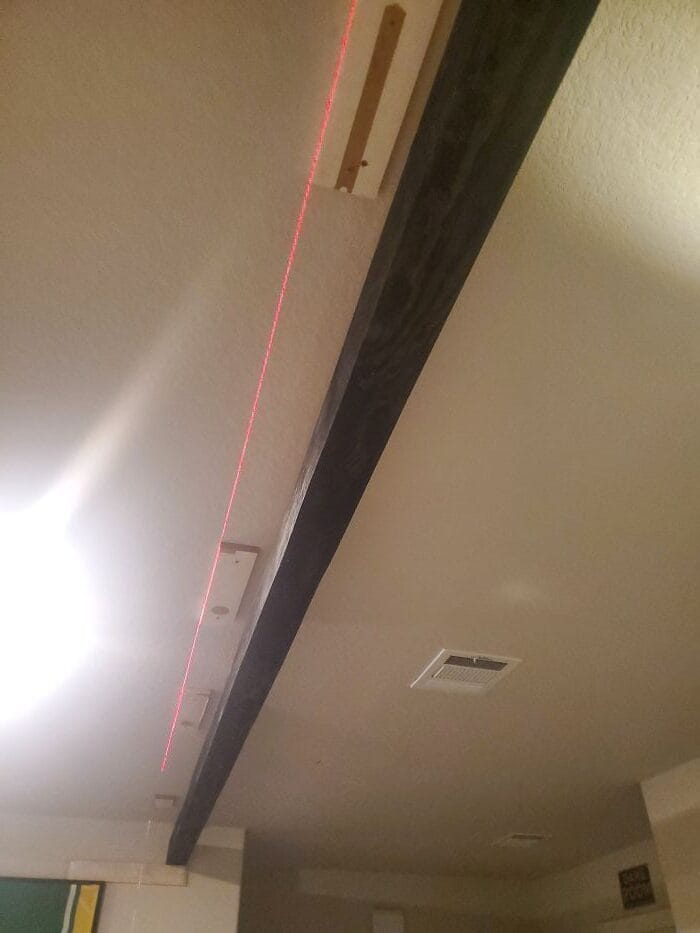 Installed mounting cleats
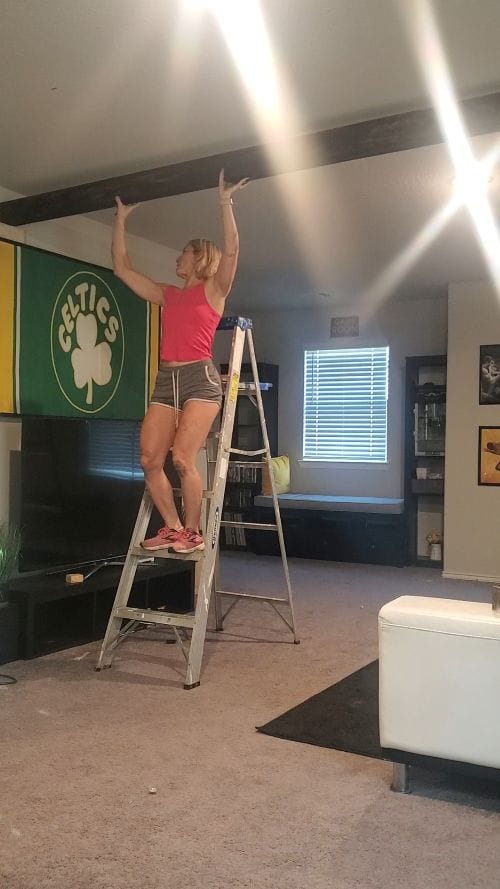 Lifting the beam onto support platform
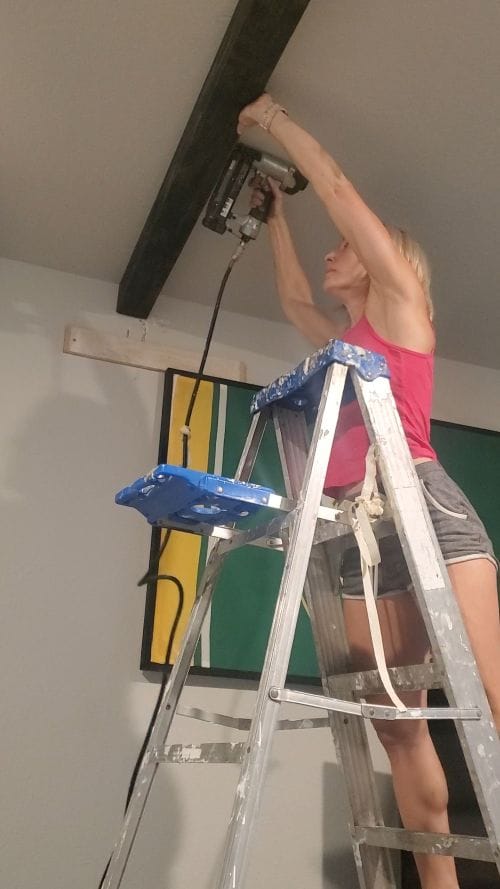 Securing the beam over the cleats with brad nails
The turnout honestly felt like a huge achievement. These beams look solid, architectural, and completely custom—yet they cost a fraction of what real wood beams would have.
No one would ever guess they’re hollow or made from inexpensive ¼-inch plywood. They completely changed the room, adding depth, structure, and that final layer of character the space was missing.
Q&A, Pro-Tips
Q: Would you do anything differently if you did it again?
A: Honestly, no! These hollow beams saved me a ton of money, and even using inexpensive plywood, the final result looks high-end and completely convincing.
Q: What are the most critical tools for a successful outcome?
A: Measuring long distances can be tricky, especially if you’re working solo. That’s why a laser measuring device was absolutely essential. A stud finder and laser level/line were also must-haves to ensure proper alignment. Finally, a table saw capable of cutting 45-degree angles is necessary to assemble clean, seamless beams.
Q: Any recommendations before starting?
A: Always build a prototype first. It’s much better to test the look before investing all your time and materials. Cardboard or scrap wood works perfectly to get a feel for the scale and placement. This step can save a lot of frustration and ensure you love the final result.
Related Projects
This post is one chapter in a larger transformation—explore the related projects below to see how each part comes together to complete the full vision:
- Refurbished Media Console
- Builder-Grade Game Room Transformation: Sporty Wall Makeover Inspiration
- Game Room DIY Window Seating with Popcorn Station (IKEA Hack)
Shop the Look
Create this dramatic Game room setup with the items (or similar) that brought this project to life: Shop my Game Room