How to Install a French Drain (Torrential Rain Drainage Solution)
It seems like nowadays, torrential rain events become more and more the norm, which makes a good drainage system like a french drain almost a requirement for any house. Many new houses are lucky and are build with proper grading and a swale which naturally diverts the stormwater to the front of the house/ the street.
Unfortunately our old house had very poor grading and the proximity to the neighbors or surrounding structures didn’t allow for a proper swale. Gutters alone did not help at all during the torrential rain events, so our only solution was a french drain. It is quite labor intensive, but it was completely worth it.
We also added two sump pumps to the system for faster water drainage. The system was designed so that it could run without the pumps. This is especially important during hurricane conditions when you might end up without electricity. Continue reading to learn more about our set-up.
Understanding the drainage needs
Before you start digging french drains, observe the water flow during these heavy rain events. Where is it exactly accumulating, where does it come from and flow to? This helps to better understand the weak points. We had many culprits:
Improper Grading due to Broken Concrete: Swale Solution
We had broken concrete at the side of the house which was funneling the water to the foundation. In addition water piled up and flowed to the back of the house where it accumulated instead of flowing to the street. The only solution here was to remove the concrete, fill up the area with dirt and grade it properly so the water could flow away from the house. At first we had a sump pump installed at the back of the house to convey the water to the front, however, this solution was 100% depending on the sump pump to function. Once the grading was fixed that sump pump became obsolete.


Not Sufficient Slope/ House Sitting in a bowl: French Drain Solution
Even if your grading along the foundation is sufficient, it doesn’t help if the entire house is sitting in a bowl. Meaning, the water will always accumulate before it is able to runoff. This was another scenario we were facing and a swale would have not fixed the problem as you can see on the pictures below.


Our only solution to the problem was a french drain to achieve the necessary slope. However, there was just so much water from the entire yard flowing right into the bowl during torrential rain events which required almost a retention pond. The drawing below demonstrates how we combined a french drain with an additional water retention system to handle large amounts of water at once.:
Water flows into the catch basin, thru the corrugated pipe into the sump pump basin. The sump pump pumps the water up into a solid PVC pipe. The water then flows towards the street. The set-up also works without the sump pump. Water would accumulate inside the corrugated pipe, between the riverrocks and in the sump pump basin until a level is reached and the water overflows into the solid pipe to the street.

Installing the French Drain
Once you understand where the water is coming from, where it accumulates and where it needs to flow to, you should start with a rough drawing of your french drain system before you start the project. Below is a drawing which shows our set-up:
A french drain system with corrugated pipe and riverrocks is used at the backside of the house and the right side. The left side of the house offered sufficient space for a swale.

1. Digging the trenches
Digging the trenches is the most strenuous activity in this process. While you can rent equipment to dig the trenches, working in tight spaces makes it very difficult to use. Hence, we dug the trenches with a shovel 1-2 feet deep. It is important to ensure a slight slope for faster drainage and to avoid standing water after the rain event.

2. Installing the catch basins and sump pump basins
To install the basins deeper holes are needed at the predetermined locations. This is a lot of fun when dealing with clay soil 😉

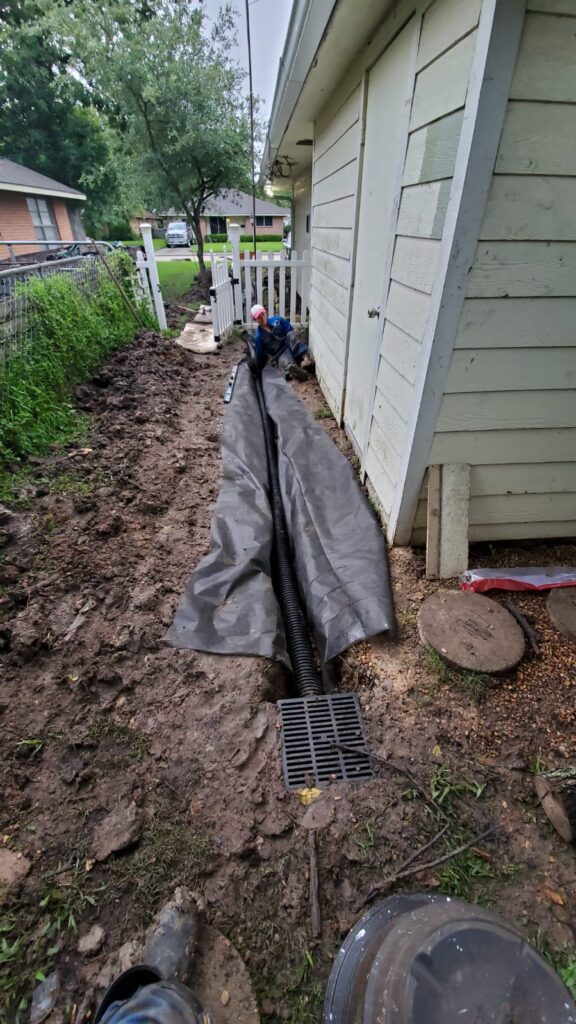
3. Installing the lining
After all the digging, finally the easy part. Lay down the landscaping fabric in the trenches. The fabric needs to be wide enough so that the pipe and some riverrocks can be easily wrapped.
4. Installing the corrugated perforated pipe
Simply place a shallows layer of riverrocks on top of the landscaping fabric. Then, lay the corrugated perforated pipe on top of the rocks connecting the ends with the basins. Shovel another shallow layer of riverrocks on top of the pipe. Then wrap everything with the landscaping fabric.

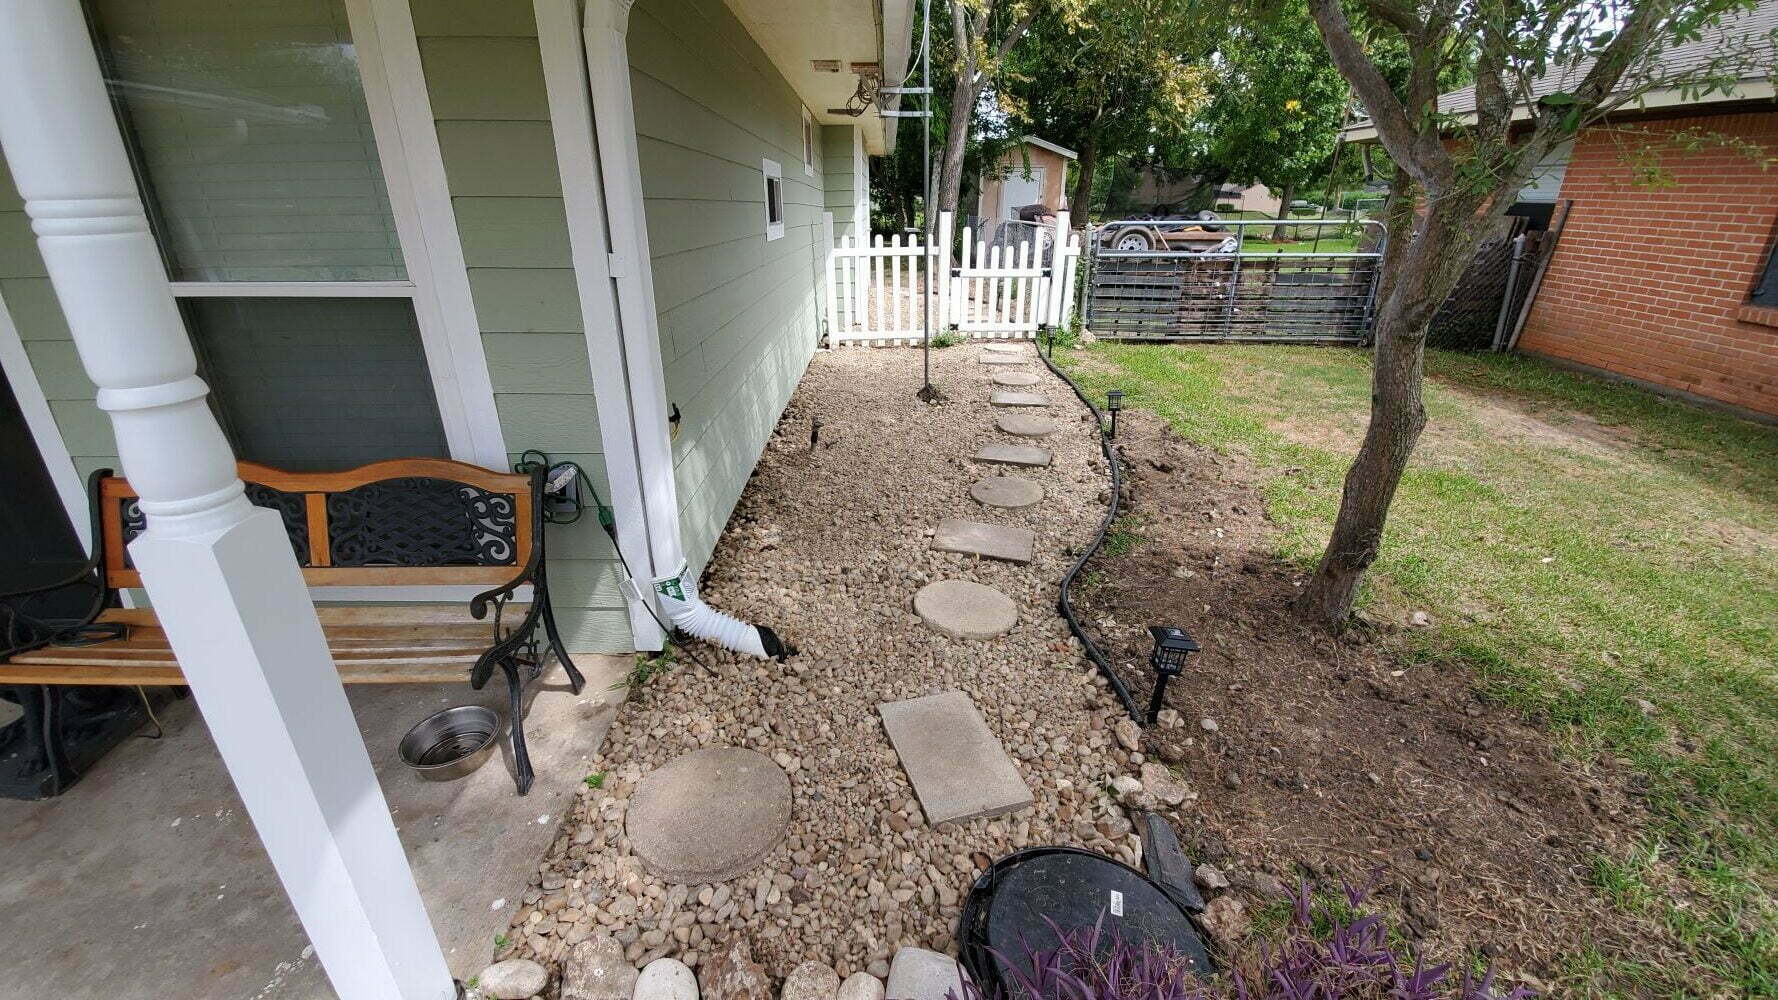
5. Filling the trenches with rivererrocks
Finally, the trenches are filled up with the remaining riverrocks. While you can top it off with soil, we wanted the rocks surrounding our house as clean landscaping design.

Materials and Tools used for a French drain
- Riverrocks (bought in bulk from local landscaping company)
- Landscaping Fabric
- Corrugated Perforated Pipe
- Sump Basin
- Catch Basin with grate
- PVC drainage pipe (elbows or transition pieces and drain grates as needed)
- PVC glue (if needed)
- Sump Pump (optional)