DIY Archway Build: Add Architectural Character to an Open Floor Plan on a Budget
Modern builder-grade homes often come with one big open space. While open floor plans feel spacious, they can sometimes feel a little unfinished—almost like one large room without any definition.
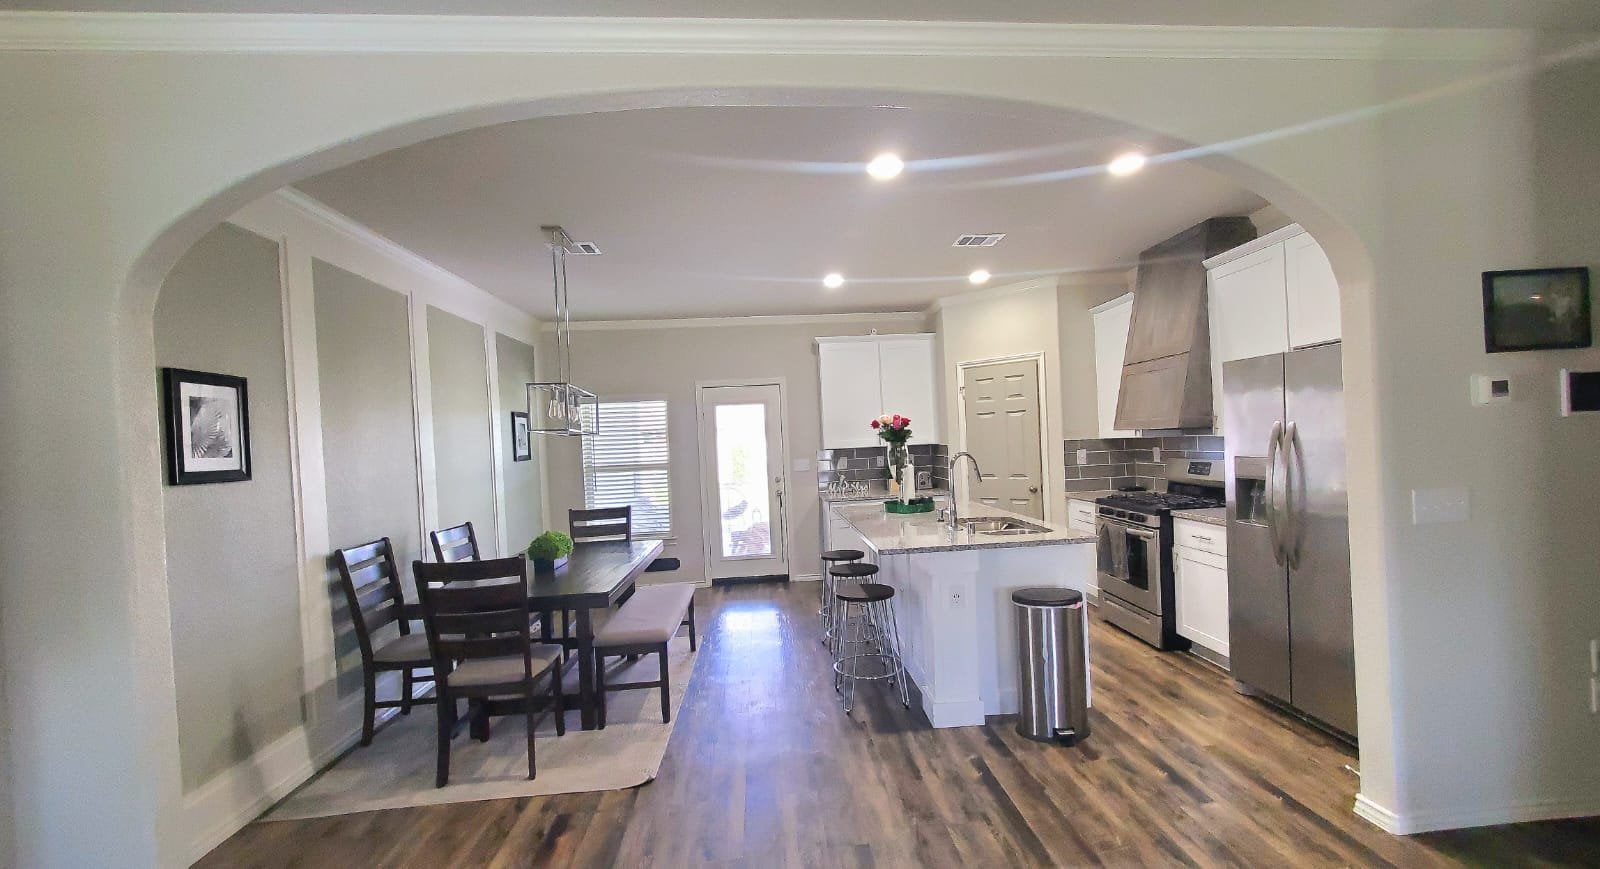
That was exactly the challenge in our home. Our living room, dining area, and kitchen blended together into one long space. I didn’t want to close it off, but I wanted something that would visually separate the areas and add character.
The solution? A DIY archway.
An arch adds softness, architectural detail, and a custom-home feeling without sacrificing the openness of the space. The best part? This project cost a fraction of what a contractor would charge.
Disclaimer: This post contains affiliate links. I may earn a small commission if you make a purchase, at no extra cost to you.
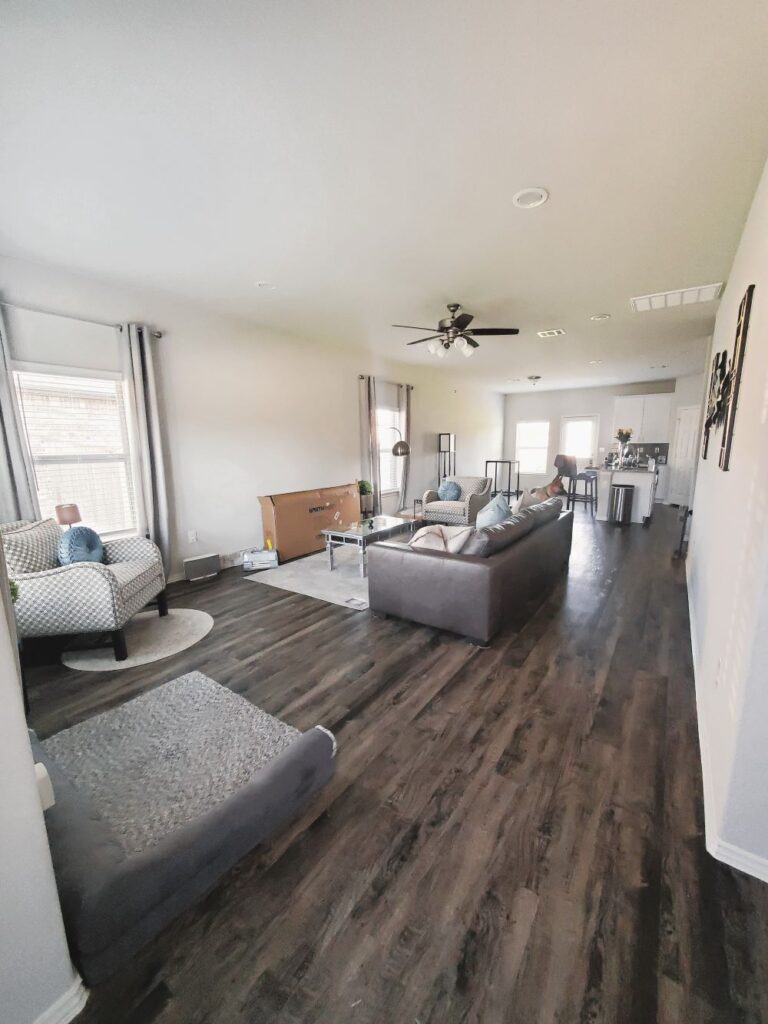 Living Rom Before
 Living Room After
Project Snapshot / Quick Facts
- Skill Level: Intermediate
- Time Required: 1-2 Weekends
- Cost: ~$50-150
Materials & Tools You Need
Materials
- 2×4 lumber
- Drywall sheets
- Drywall screws
- Scrap wood pieces
- Flexible archway corner bead
- Joint compound
- Sandpaper
- Paint
Tools
- Jigsaw
- Stud finder
- Drill
- Drywall knife
- Level
- Measuring tape
- Putty knife & sanding sponge
- Safety Gear (My pink PPE from Amazon)
DIY Archway (Step-by-Step)
Step 1: Design the Arch Shape
Before cutting into anything, I needed to decide what type of arch would fit the room.
There are many options:
- Rounded arch
- Half-circle arch
- More modern elliptical arch
I decided on an elliptical shape because it felt softer and more modern while keeping the opening as wide as possible. Here you can find instructions on how to draw an ellipse using the string method.
Before committing:
- Created a cardboard template
- Tested different heights and curves
- Adjusted the shape until it felt proportional
Tip: Do not skip the cardboard prototype. It’s much easier to adjust cardboard than repair drywall.
Step 2: Mark and Cut the Drywall
Once the design was finalized:
- Transferred the arch shape onto drywall
- Used the template to ensure both front and backsides matched
- Cut the drywall using a jigsaw
Step 3: Build the Archway Frame
Like any wall structure, the arch needs a solid frame behind the drywall. I added a horizontal header using 2×4 lumber and additional vertical supports on both sides where the curve would connect. The framing creates a long-lasting structure, stability and something solid to attach drywall to.


Step 4: Create the Curved Arch
The hardest part was creating the smooth curve. To support the drywall I cut small scrap wood blocks and attached them along the arch shape. These small pieces act as support points behind the curved drywall. For the inside curve I cut drywall strips to size and scored the backside paper every 1–2 inches. This allows the drywall to bend smoothly around the arch.
Step 5: Install Drywall & Shape the Opening
Once the frame was ready I attached drywall pieces using drywall screws and installed the curved drywall section underneath the arch. The scored drywall bends gradually and follows the curve. At this stage the shape finally becomes visible and the opening starts looking like a true architectural feature.


Step 6: Finish the Drywall
This is where the magic happens. To create smooth transitions I installed flexible archway corner bead and applied multiple layers of joint compound while sanding between coats. This created a smooth transition between old wall and new arch. This step takes patience but makes the final result look professionally finished.


Step 7: Match the Existing Wall Texture
Because our home had a textured drywall finish I added joint compound texture to blend the new arch with the existing walls.
This archway became one of my favorite upgrades in the house. It adds character to a builder-grade home, creates separation without closing the space, makes the room feel more custom and adds a timeless architectural element
The room still feels open—but now it feels intentional.
DIY Archway Q&A, Pro Tips
Q: Is building an archway difficult?
A: The framing is straightforward, especially once you have a template, but drywall finishing requires patience and attention to detail.
Related Projects
Looking to further upgrade your walls? Check out my related projects:
Shop the Look
Check out all of my home organization finds on Amazo